Advance Tutorial: Ragdoll Physics
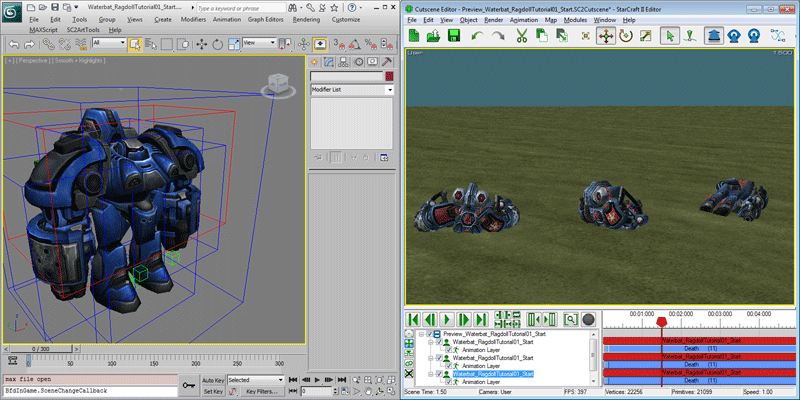
In StarCraft II, the 'Domino Physics Engine' supports jointed physics which can be used in anything from simple hinged doodads to ragdoll deaths in the game. This tutorial introduces you to setting up jointed physics objects for a ragdoll death.
Getting Started
-
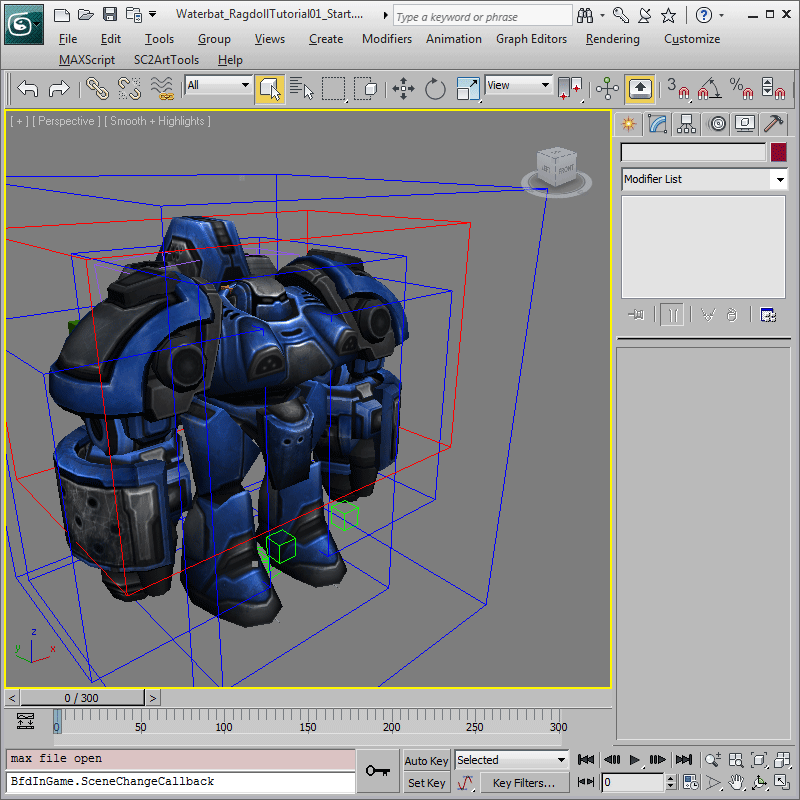
Open 'Waterbat_RagdollTutorial01_Start.max.max'. This contains a fully set up Waterbat with a death animation in it.
-
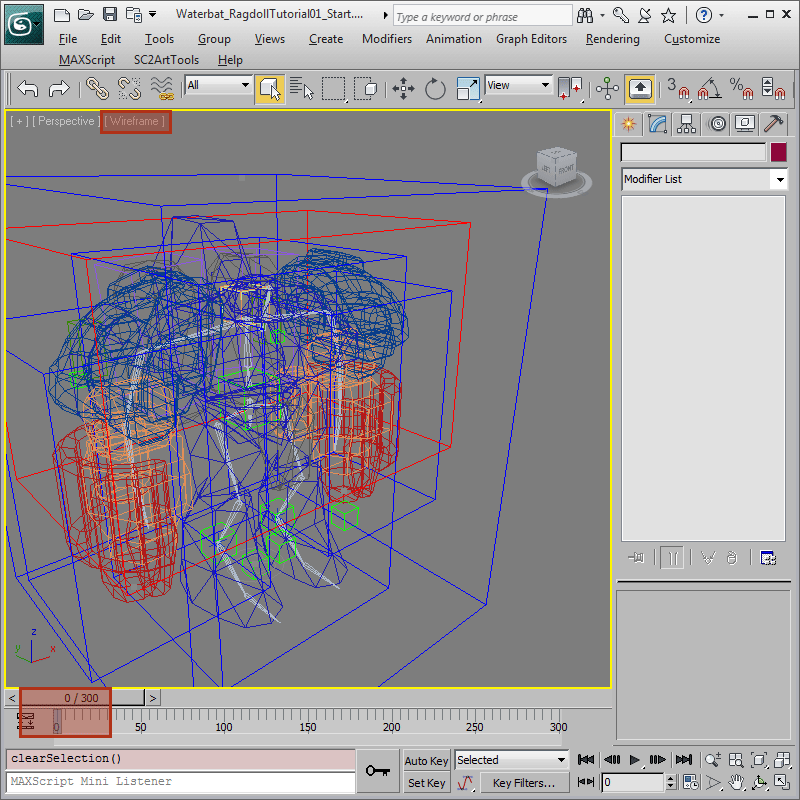
Before we get on with creating the ragdoll. Let's set up the scene to make it easier to work with. Since we are going to be dealing mostly with the bones, let's change to Wireframe mode so we can see them. Further, make sure the current time is at frame zero as well.
Main Body Joint
-
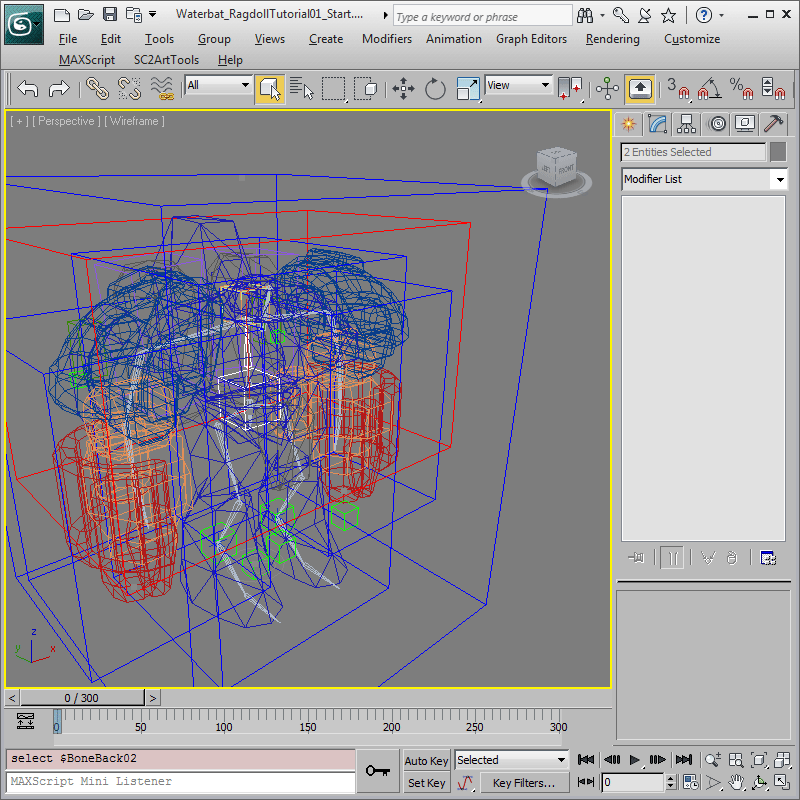
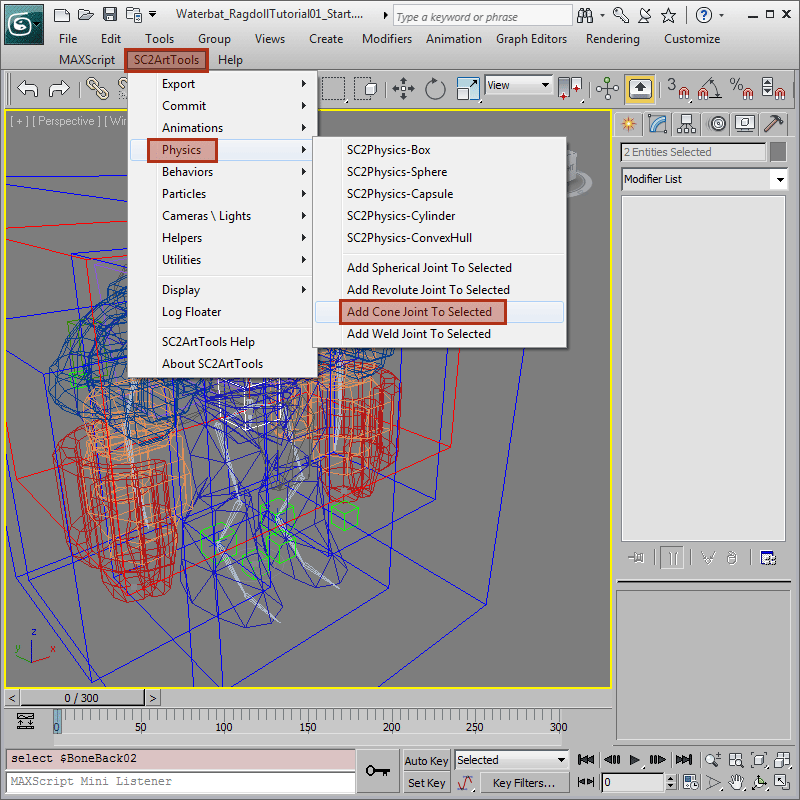
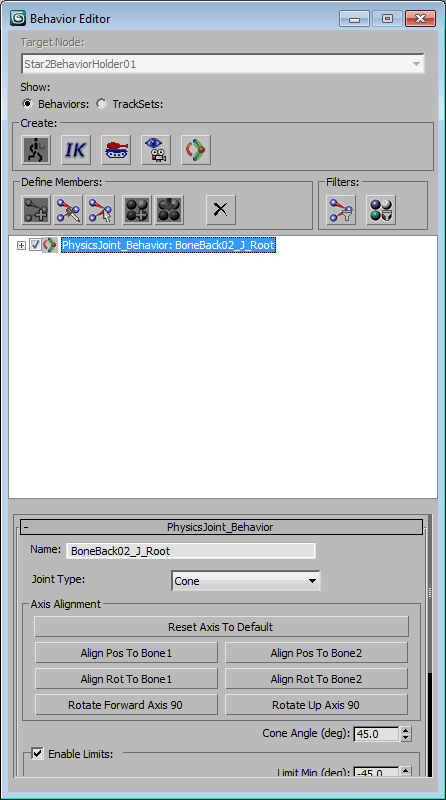
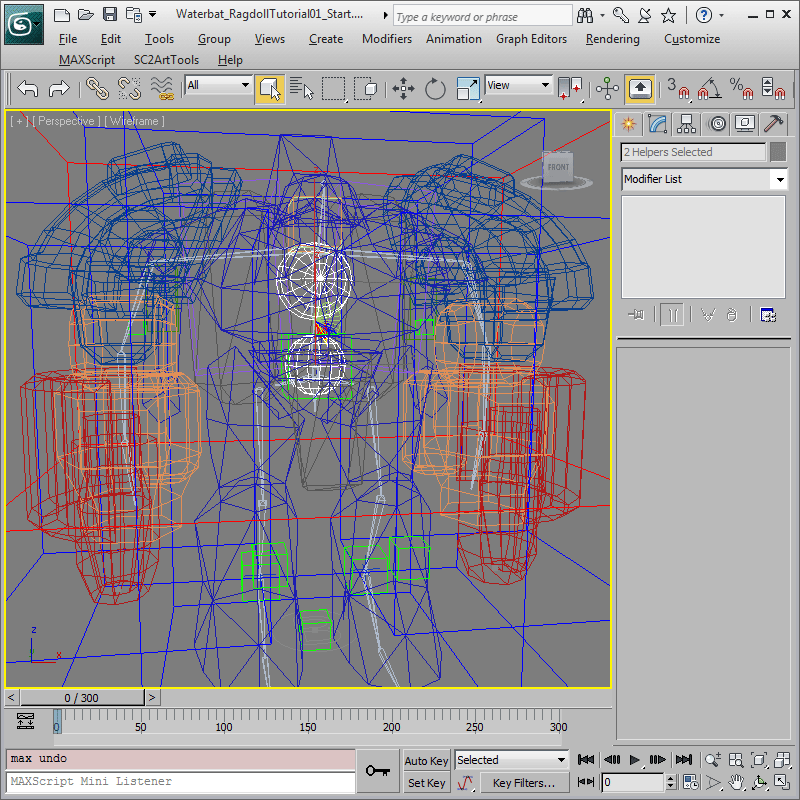
The first joint we are going to create is for the main body. This consists of the 'Root' which is the top bone in the hierarchy; and 'BoneBack02' which is the upper Body. Select those two bones and add a Cone Joint between them by invoking 'SC2ArtTools > Physics > Add Cone Joint To Selected'. The Behavior Editor should pop up automatically and a new 'Physics Joint' behavior should now be listed. SC2Physics helpers have also been auto-created for those two bones thus turning them into physics bodies.
-
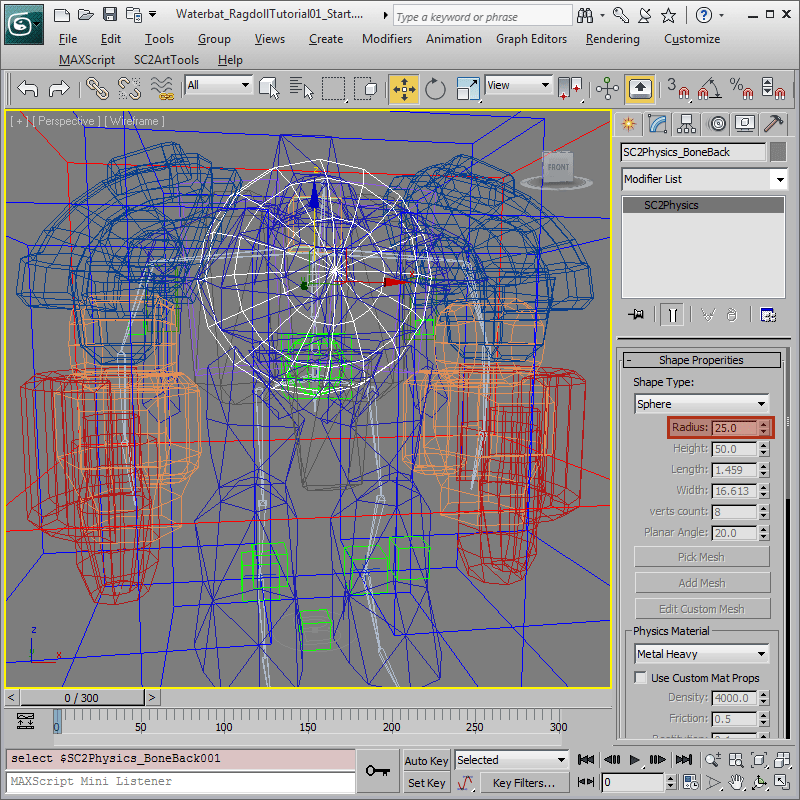
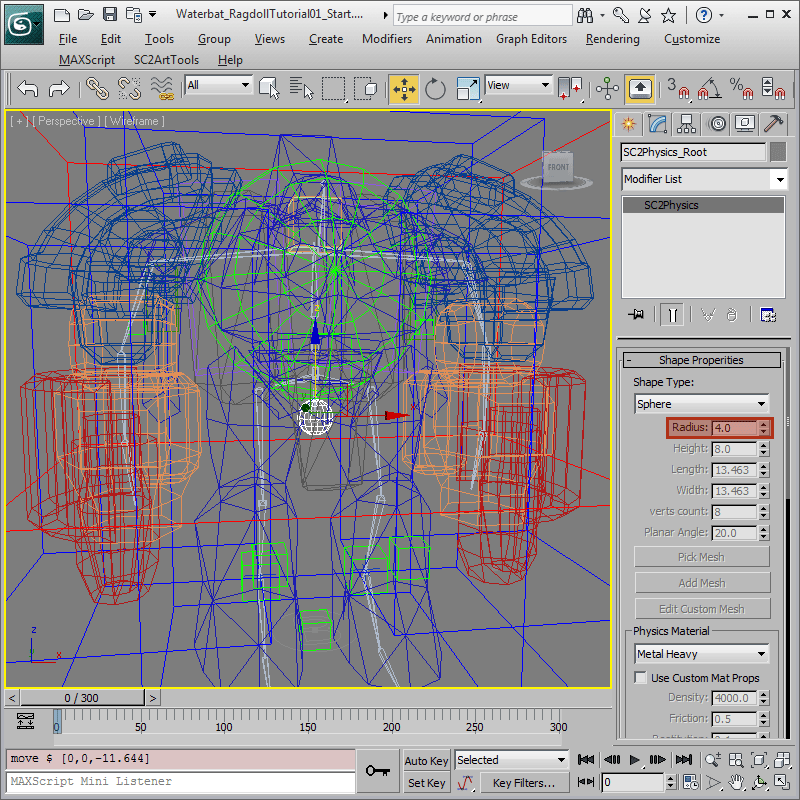
Let's fine-tune the auto-created SC2Physics helpers so that they better represent the body mesh. Select 'SC2Physics_BoneBack', change the Radius to 25. For 'SC2Physics_Root', since it doesn't play much of a part in collision for this case, select it and change its Radius smaller to 4 and move it down slightly and out of the way as shown.
-
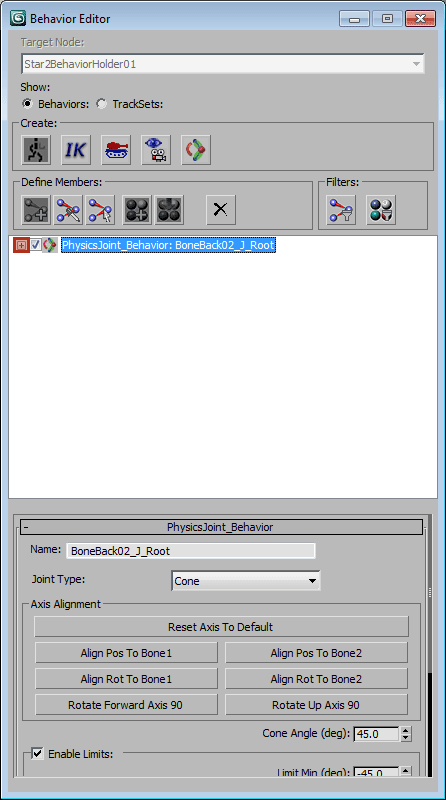
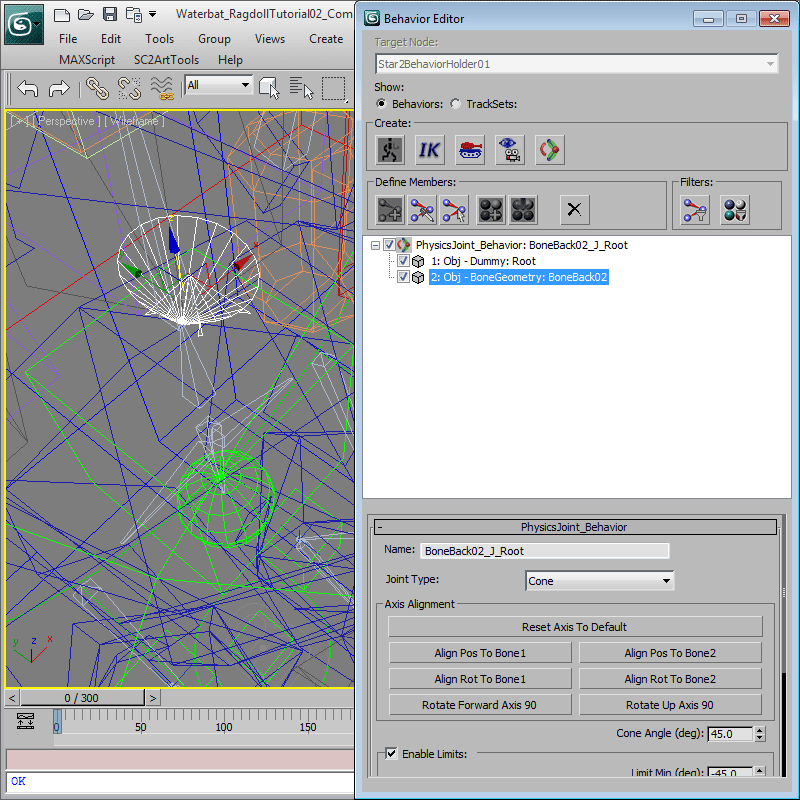
Now we are going to adjust the actual joint. In the Behavior Editor, press the '+' button to expand and show the associated bones. Zoom-in a bit in the viewport, and you should see a visual representation of the joint as cones. It may seem like only one cone at the moment, but there are actually two- one for each bone. Select both cones by Ctrl-Clicking their corresponding items in the Behavior Editor.
-
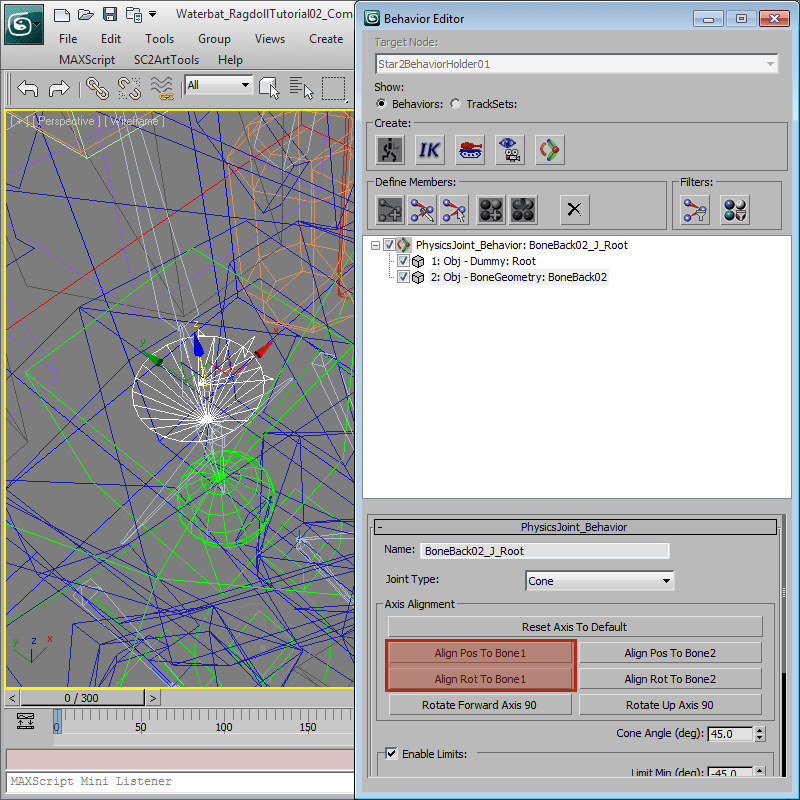
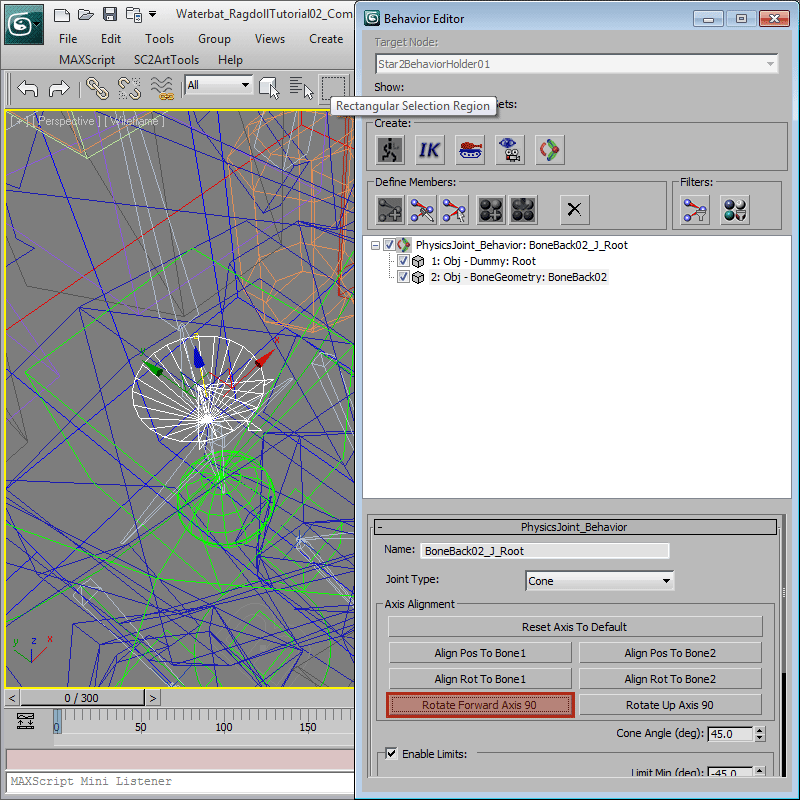
The tips of the cones represents the joint's pivot point and the tool has auto-aligned it at the child bone which is wrong in our case. Instead, re-align it to the parent bone by clicking Align Pos To Bone 1 and Align Rot To Bone 1. Next, point the large middle arrow on the base of the cone which is the forward axis of the joint toward the front of the Waterbat. Do this clicking Rotate Forward Axis 90 3 times.
-
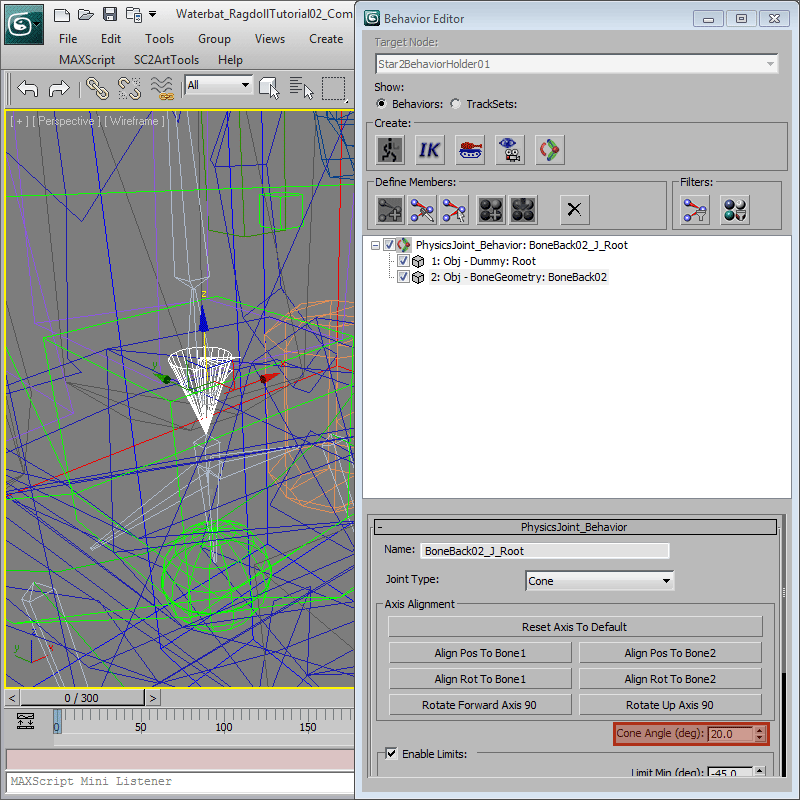
We also need this joint to have a lesser range of motion. Change the Cone Angle to 20.
-
The Main Body Joint is done. Before moving on, use 'SC2ArtTools > Display > Collapse SC2 Helpers' to de-clutter the viewport.
Arms Joints
-
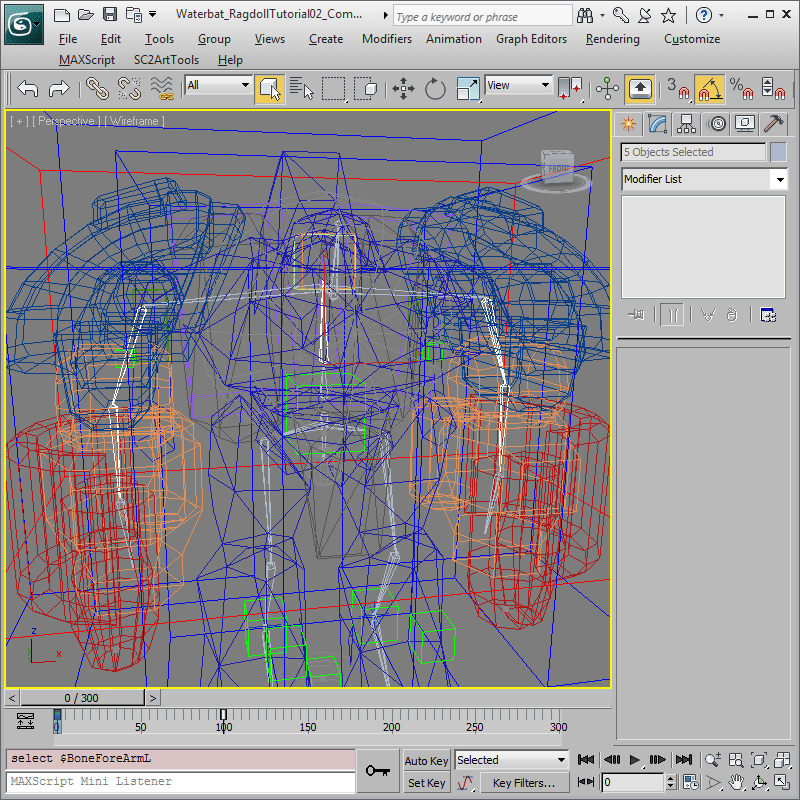
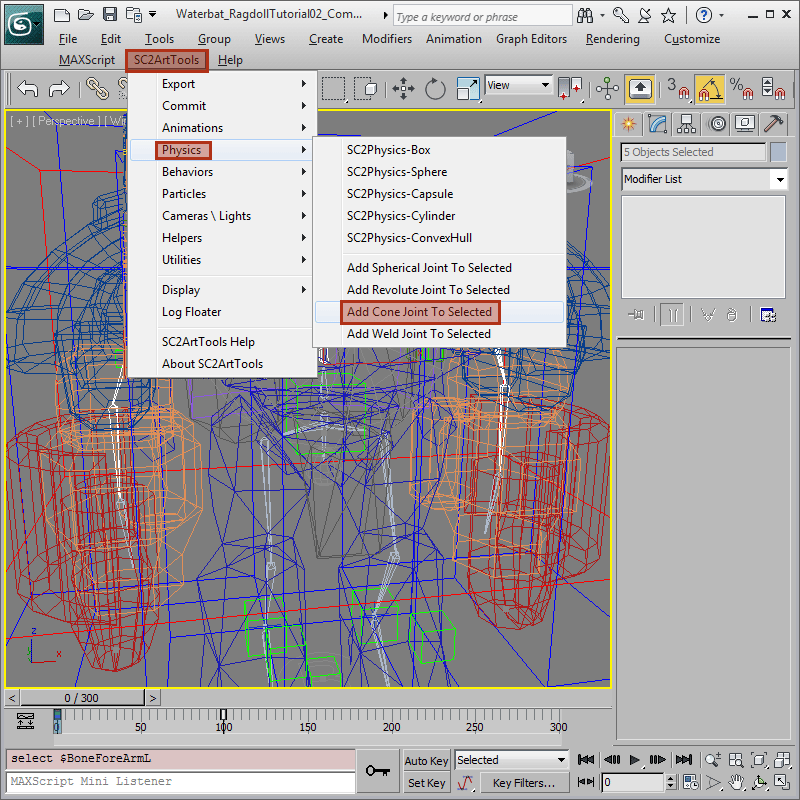
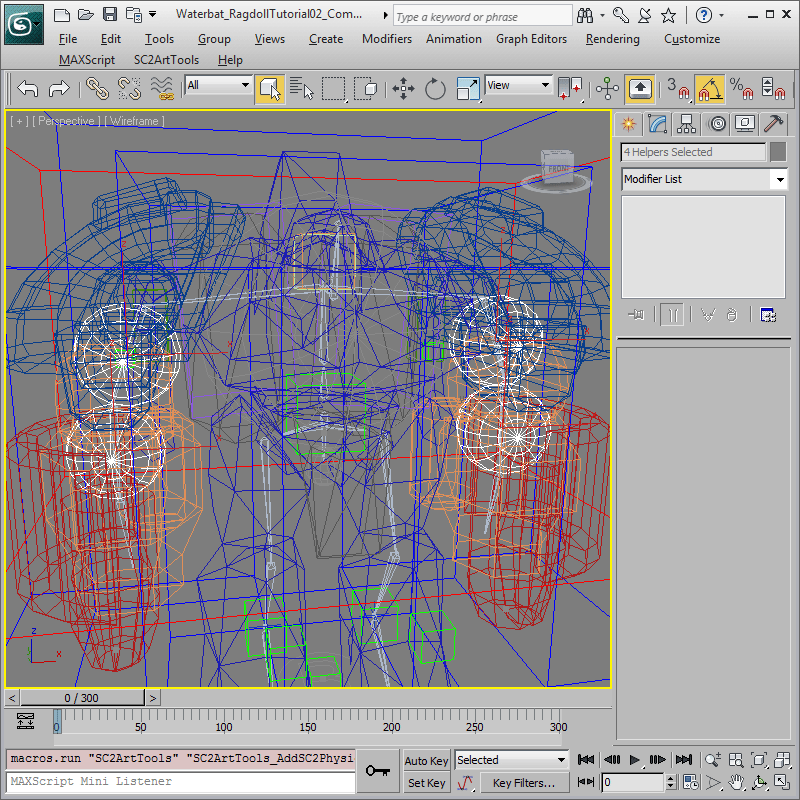
For the arm joints, let's take a different approach and make all the related joints first before making necessary adjustments. In the viewport, select 'BoneBack02', 'BoneArmR', 'BoneForeArmR', 'BoneArmL', and 'BoneForeArmL'. Use 'SC2ArtTools > Physics > Add Cone Joint To Selected' to make all the joints. There should now be 4 new SC2Physics helpers, one for each arm bone. Since a SC2Physics helpers was already created for 'BoneBack02', no new one was made.
-
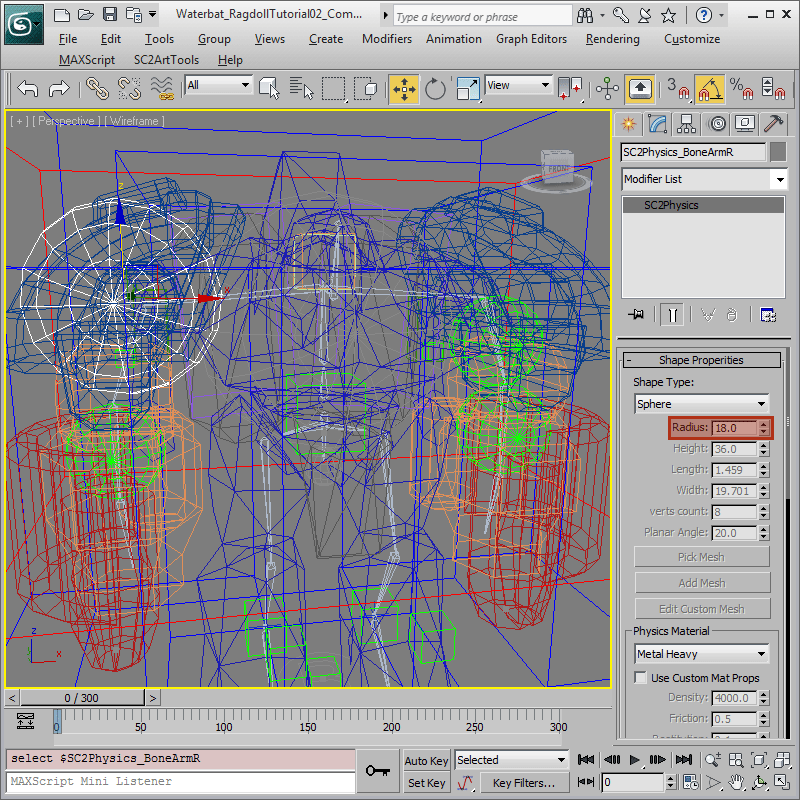
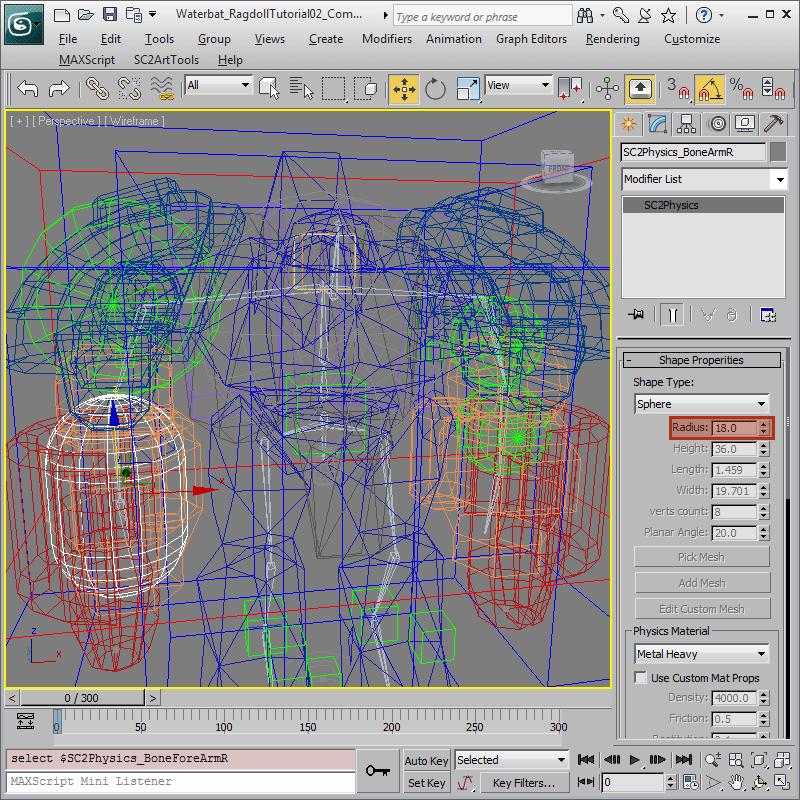
Start adjusting the SC2Physics helpers to fit the geometry better. Select 'SC2Physics_BoneArmR', change its Radius to 18 and move it higher to cover part of the right shoulder pad. For SC2Physics_BoneForeArmR, change the Shape type to Capsule with Radius of 13 and Height of 40. Rotate it and move it down so it matches as shown.
-
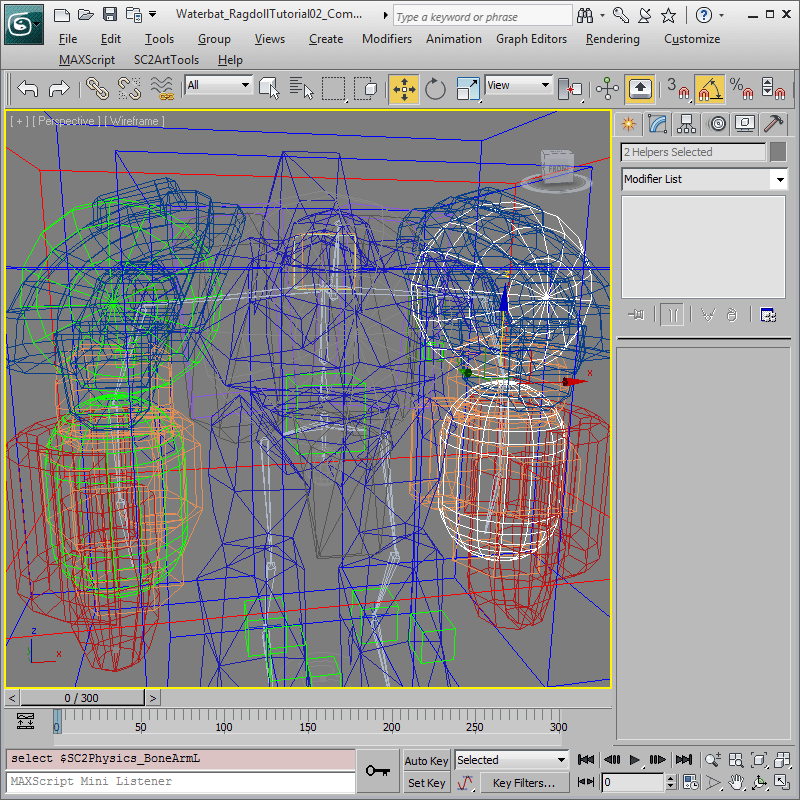
Apply the same adjustments for the SC2Physics helpers on the left arm.
-
Before going to joint adjustment, use 'SC2ArtTools > Display > Collapse SC2 Helpers' to clean up the viewport again.
-
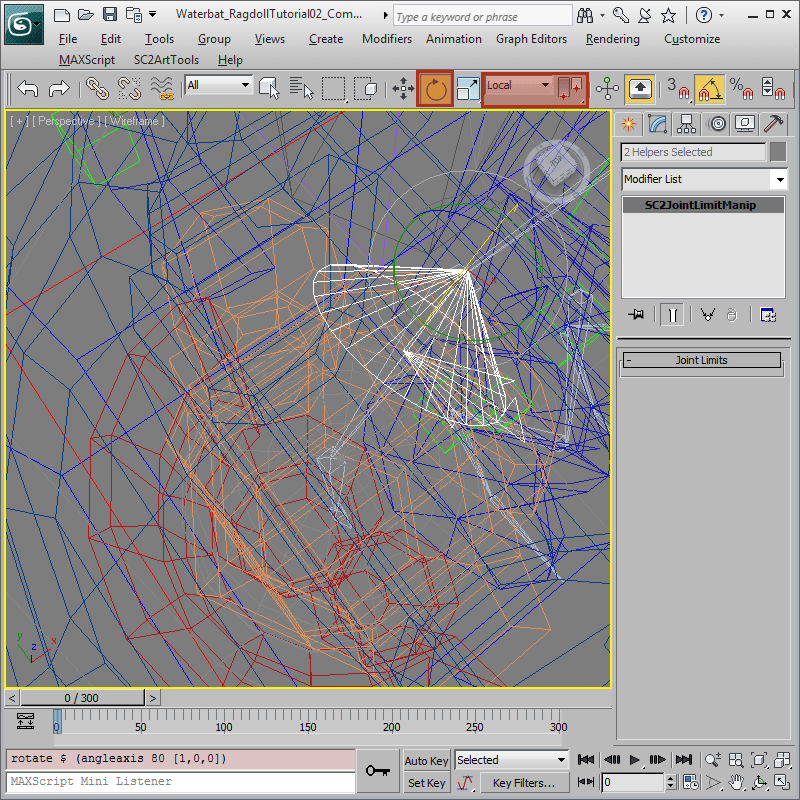
Go back to the Behavior Editor and select both cones for the 'BoneArmR_J_BoneBack02' joint. In local coordinate system, and Pivot Point center, rotate the cones until it's about parallel to BoneShoulderR with the forward arrow toward the front of the Waterbat
.
-
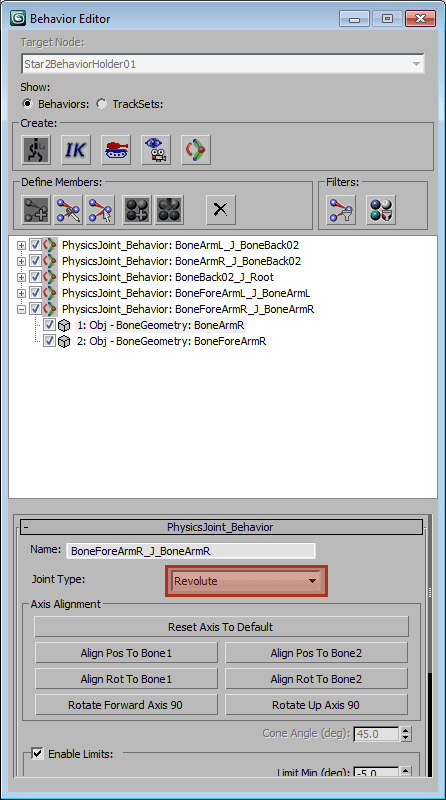
For 'BoneForeArmR_J_BoneArmR' which is the elbow joint, it should work more like a hinge. To do that, change its Joint Type to 'Revolute' instead of Cone. The joint shape in the viewport changes to a half Disc shape.
.
-
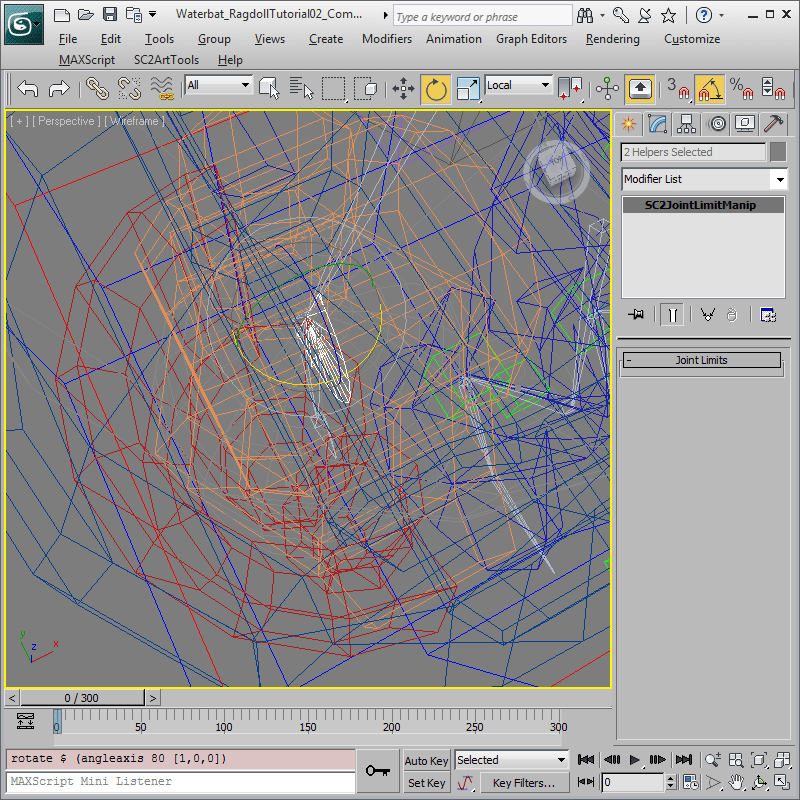
Select and rotate the discs along the z axis so that the elbow rotates around the correct axis as shown
.
-
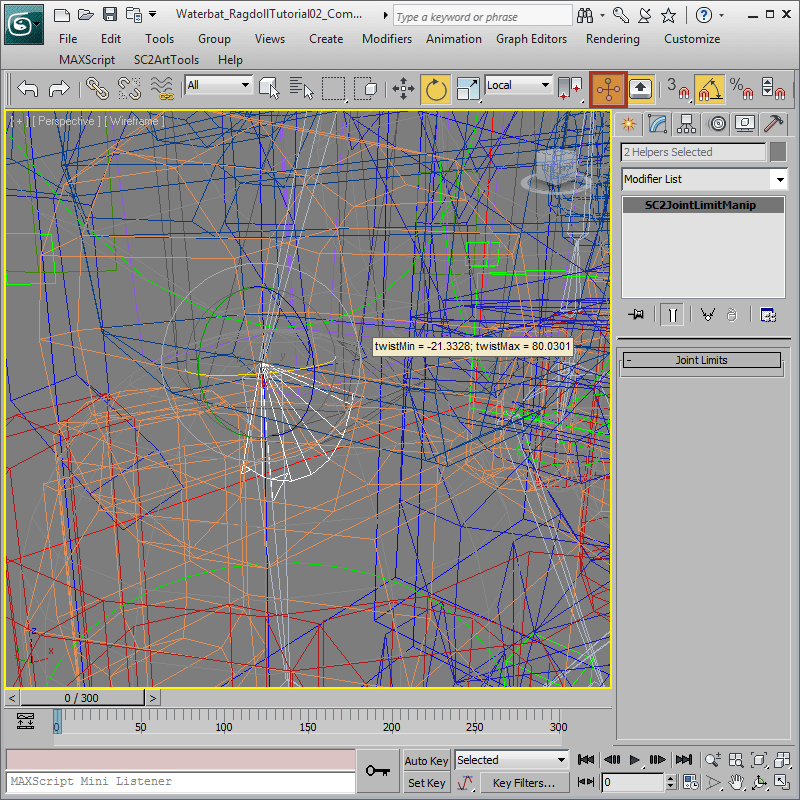
The forearm of the Waterbat is pretty big and we need to change the limits to keep it from going through the upper arm and shoulder. Instead of adjusting the Limit spinners, we can adjust the limits directly in the viewport via Manipulate mode. Turn on Select and Manipulate, then drag the triangle near the top of the screen on the disc until twistMax is about 80. Turn off Select and Manipulate
.
-
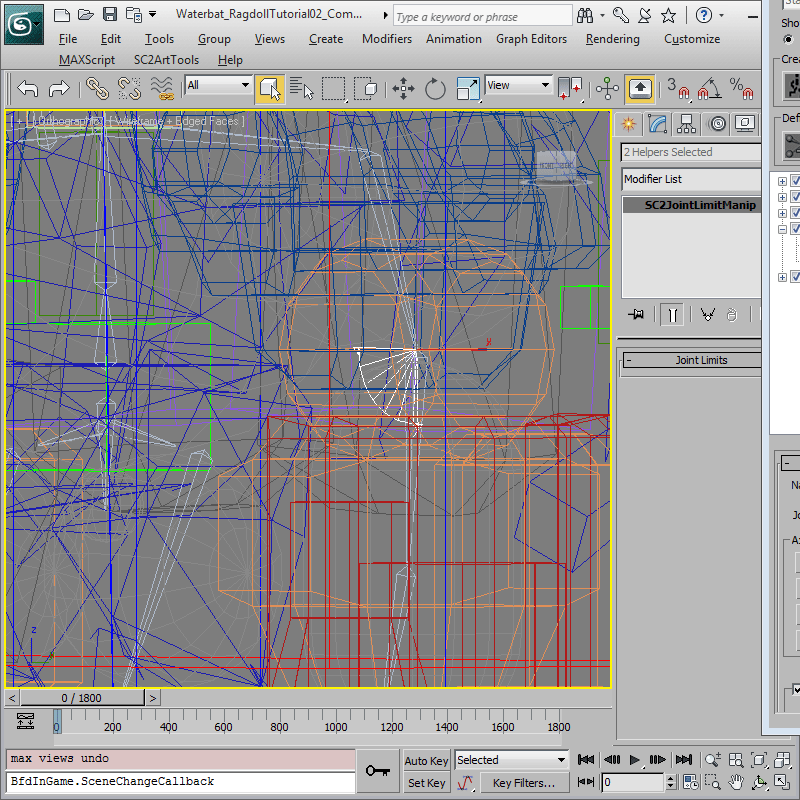
Repeat the joint adjustments for the left arm.
.
Leg Joints
-
For the leg joints, select 'Root', 'BoneLegR', 'BoneCalfR', 'BoneLegL', and 'BoneCalfL' and add joints for them with 'SC2ArtTools > Physics > Add Cone Joint To Selected'.
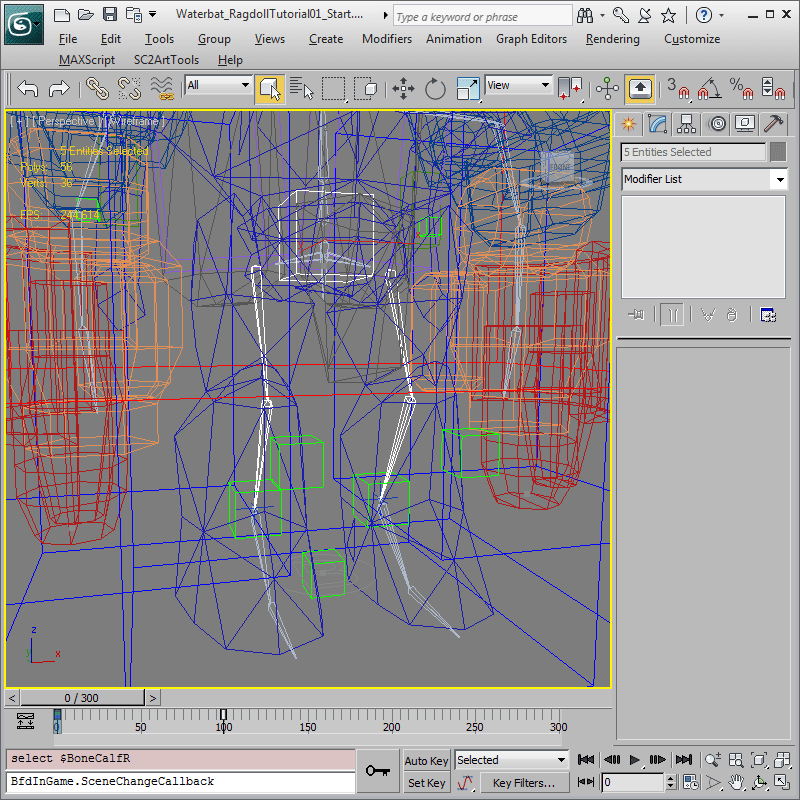

-
Adjust the SC2Physics helpers to approximate as shown.
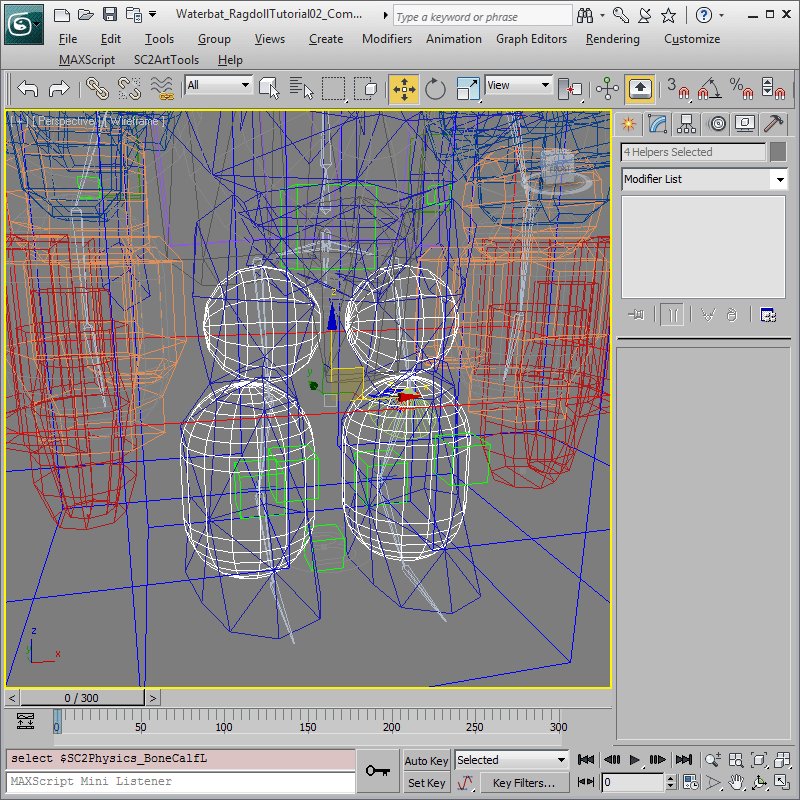
-
Adjust the alignment for 'BoneLegR_J_Root' joint as shown.
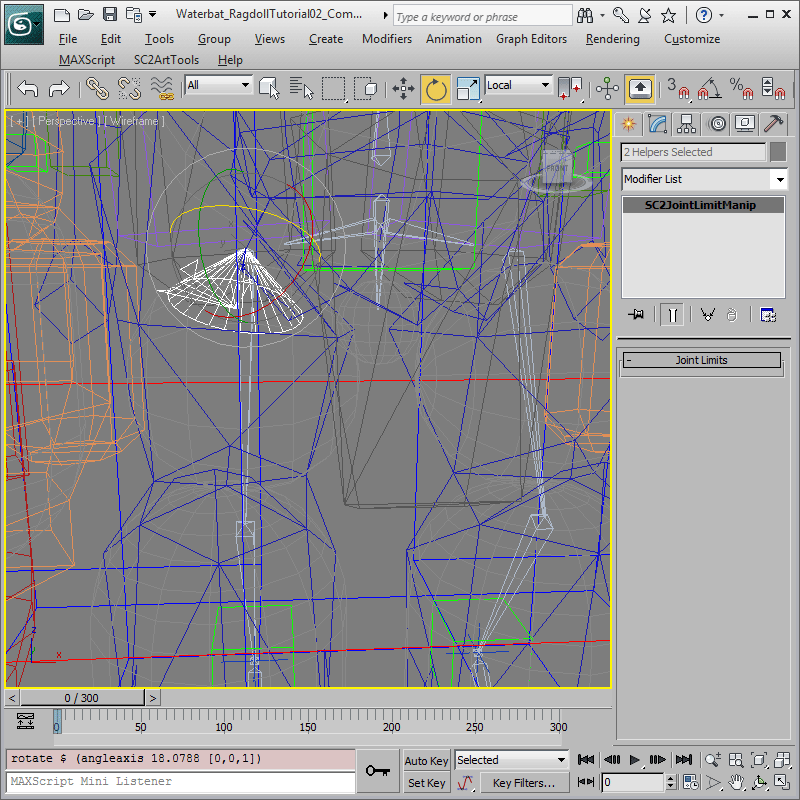
-
Change the 'BoneCalfL_J_BoneLegR' joint to Revolute and select Enable Limits.
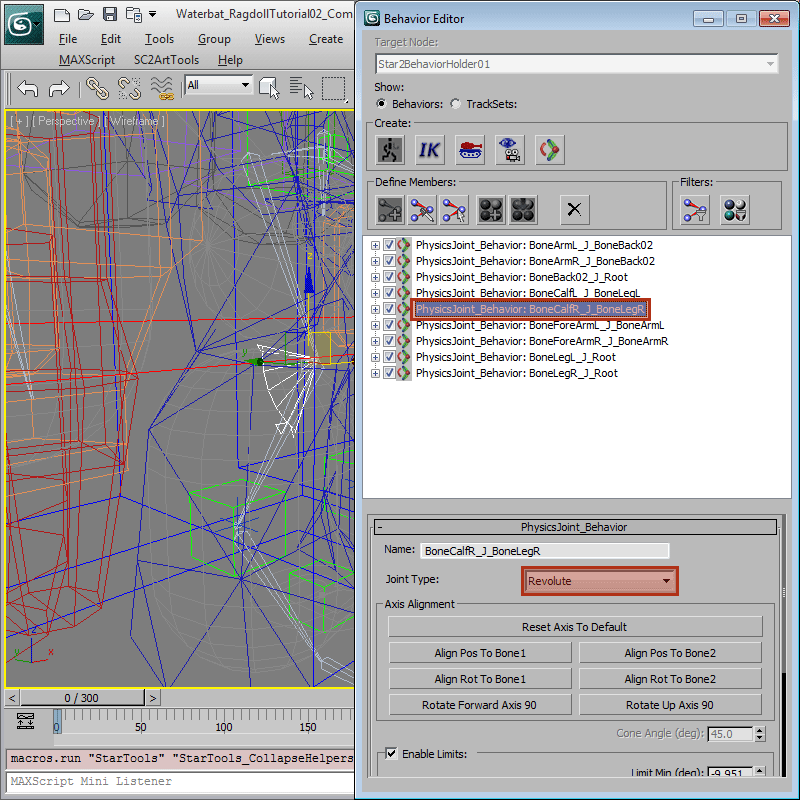
-
Apply the same SC2Physics joint adjustments left leg.
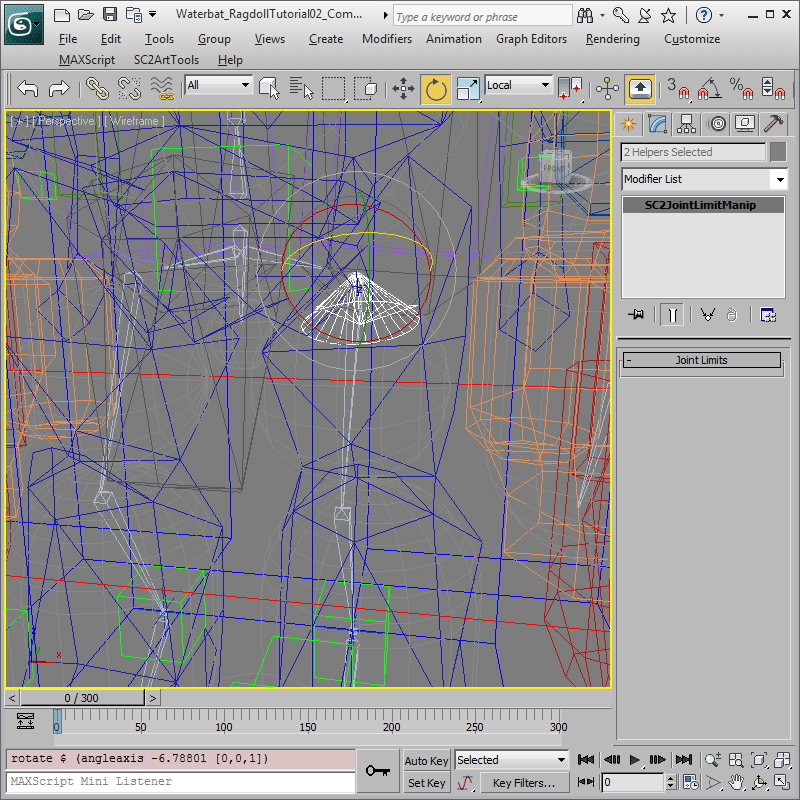
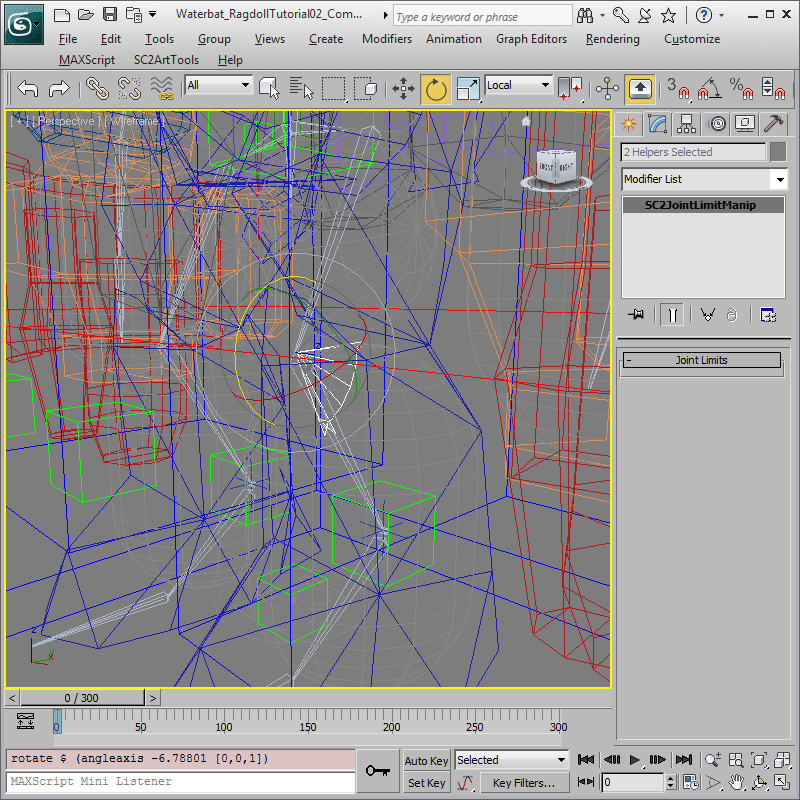
Add a Simulation Event
As explained in the Basic Physics Tutorial, by default, physics objects are created in an Active Kinematic physics state which means they won't simulate until they are turned on. For this tutorial, instead of doing that through the 'SC2Physics' helpers like we did in the Basic Physics Tutorial, we are going to use a Simulation Event.
-
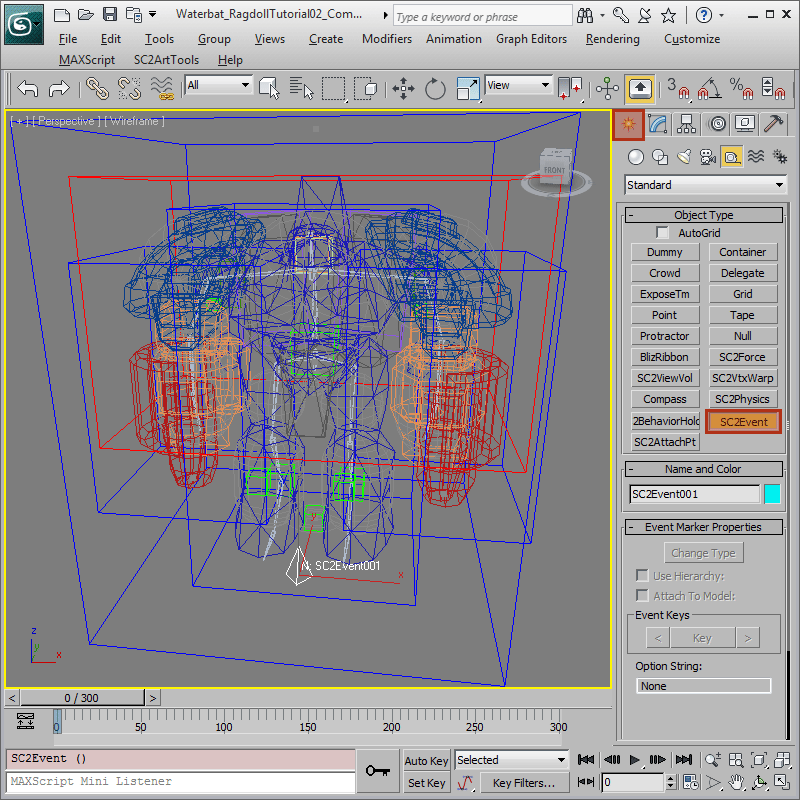
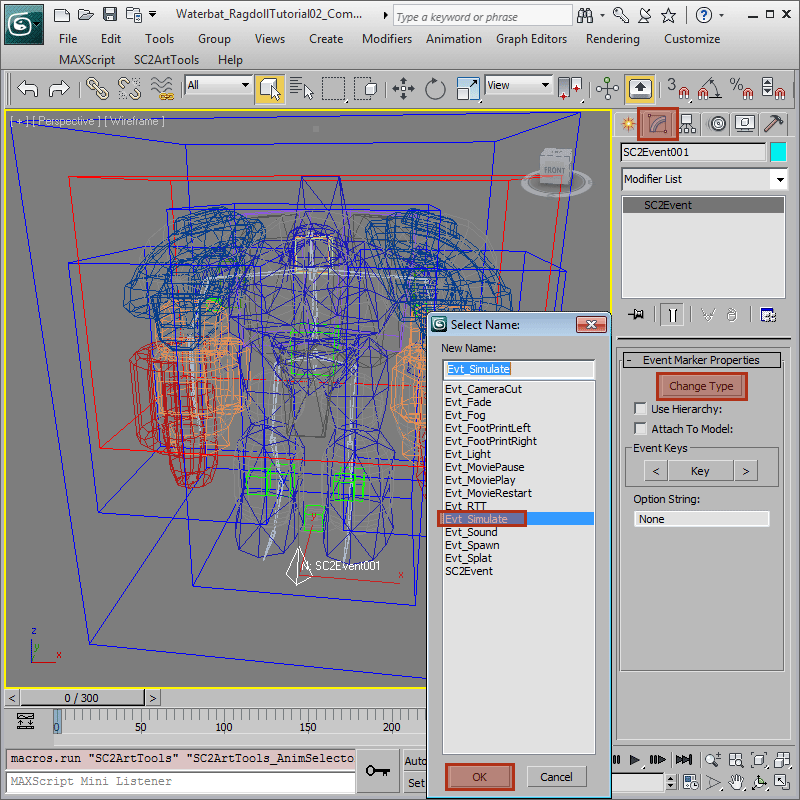
Go to the 'Create' panel, then select 'SC2Event' and click somewhere in the screen to create a 'SC2Event'. Switch to the 'Modify' panel, click the 'Change Type' and change the type to 'Evt_Simulate'.
-
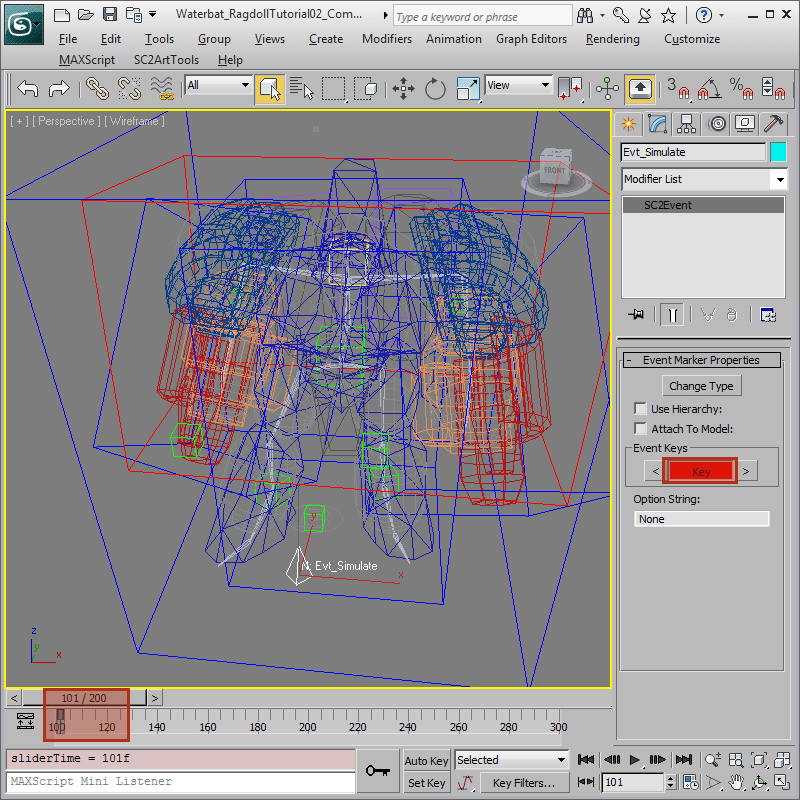
Now we are going to set a key on the SC2Event to turn all the physics objects in the scene on at the same time. Change the current time to 101 which is the second frame of the Death animation. Toggle the 'Key' button which should turn red indicating that a key is now present at frame 101.
Preview to See The Result
-
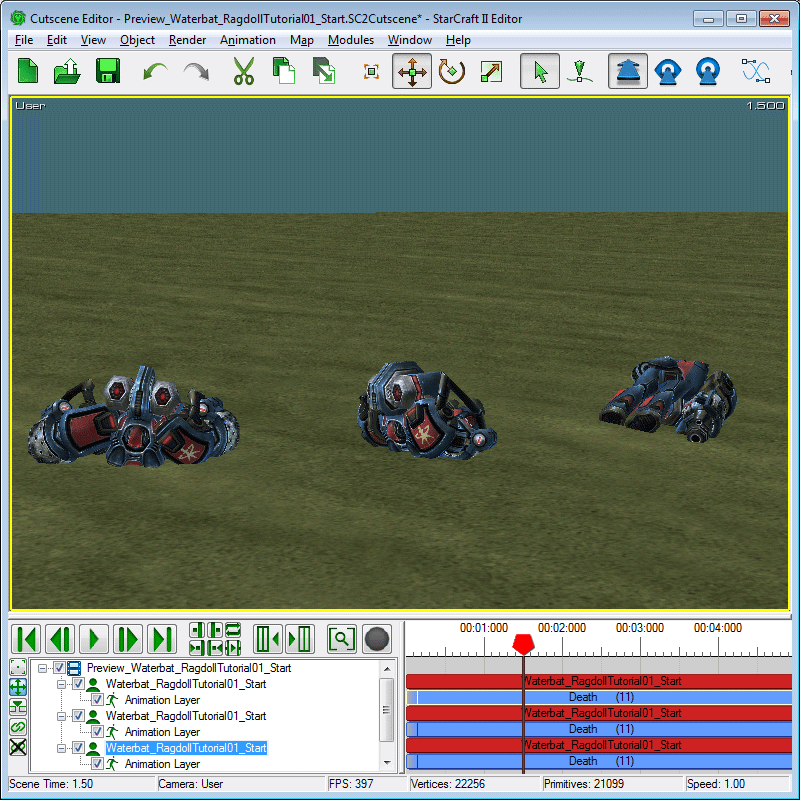
Go to 'SC2ArtTools > Export > Preview' and launch the Cutscene Editor to preview the model. In the Cutscene Editor, make sure 'Show Ground' is on. The Waterbat should collapse onto the ground as soon as the 'Death' animation plays.
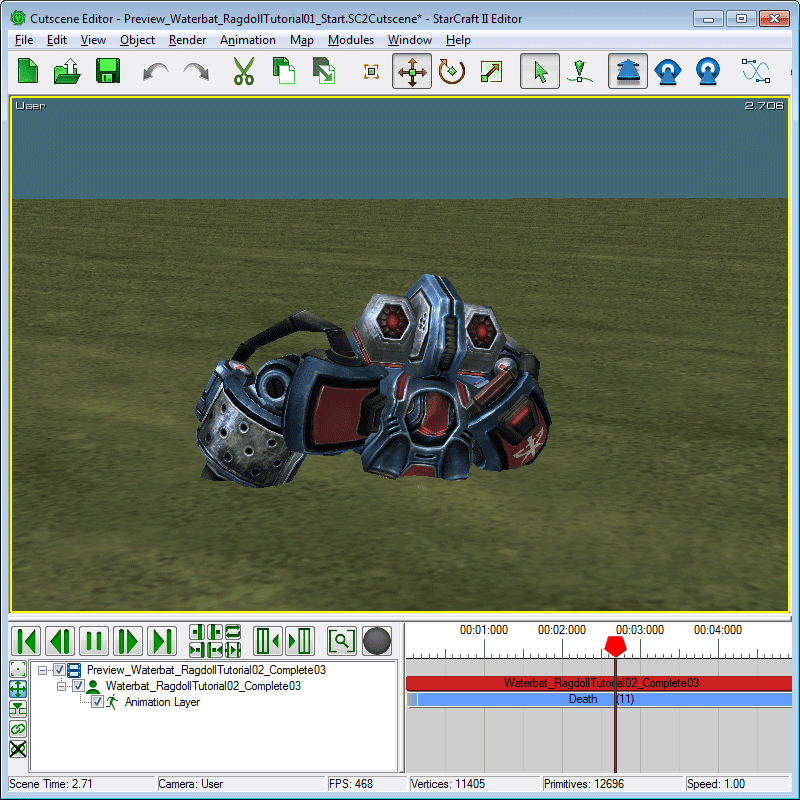
-
It is also a good idea to test the ragdoll impacting the ground from different angles. We can do that in the Cutscene Editor by cloning the Waterbat using the Copy and Paste functionality. Stop the animation playback then select the 'Waterbat_RagdollTutorial01_Start' and the 'Animation Layer' layer under it. Use 'Edit > Copy' and then 'Edit > Paste' a couple of times to create copies of the Waterbat.
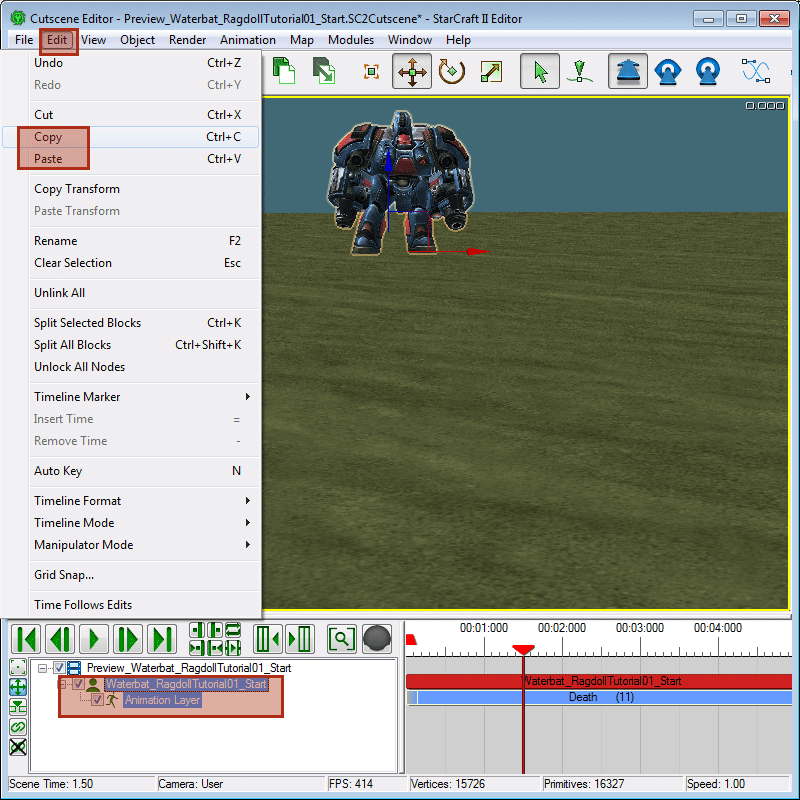
-
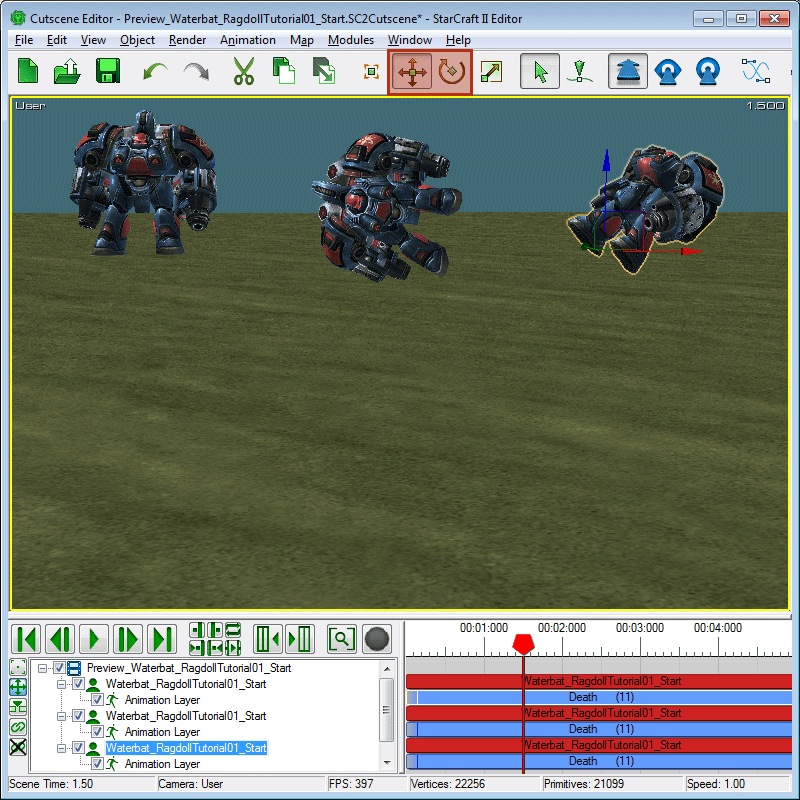
'Translate' the Waterbat copies up into the air a bit so they have some room to fall and 'Rotate' them in varying degrees. Press Play to start the animation again, and each Waterbat should fall from the air and end up in different poses on the ground.
