Tutorial 03: Helpers Objects
All Units in StarCraft II require some helper objects for them to function properly. These helper objects are created in 3ds Max and exported as part of a model file(.m3). In this tutorial, you will be introduced to three essential types- HitTest Volumes, Target Volumes, and Attachment Points.
Getting Started
-
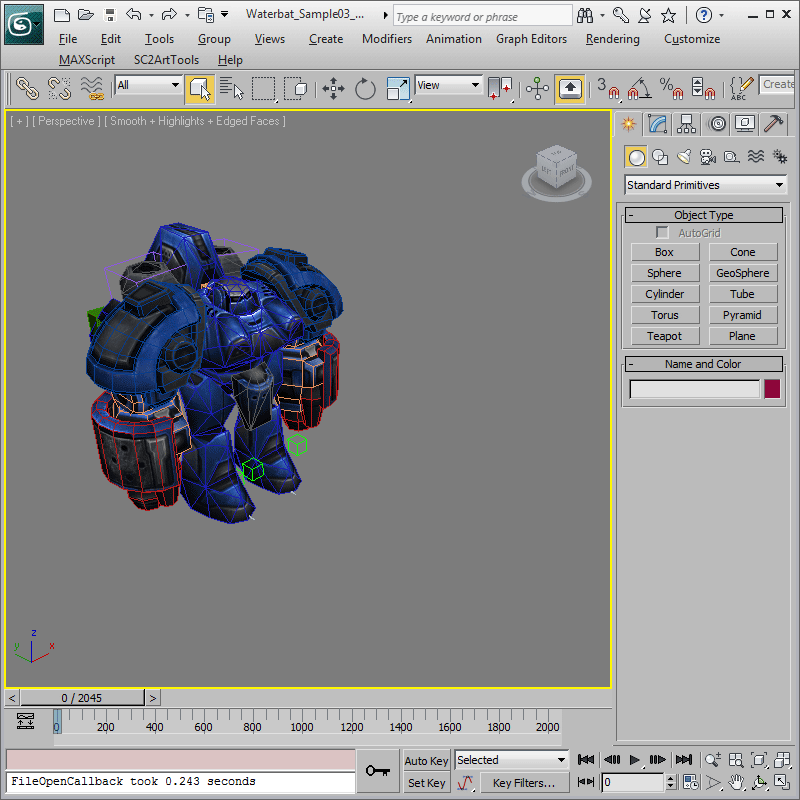
Open 'Waterbat_Tutorial04_Animated.max'. It contains a completely rigged model that is ready for helper objects.
HitTest Volumes
HitTest Volumes are primitive volumes used for selection hit-testing. There are two different types- HitTestTight and HitTestFuzzy. The first type is used for drag selection while the second is used for click selection. Both types can be made from either a Sphere, Box, or Capsule primitive shape in 3ds Max.
-
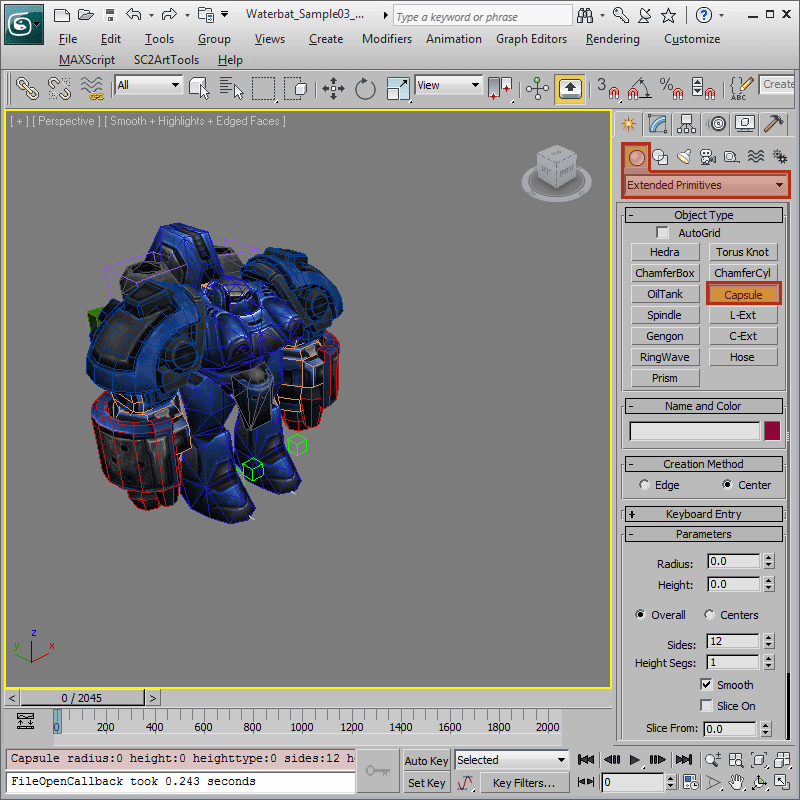
For HitTestTight volume of the Waterbat, we will be using a Capsule primitive which is found in the 'Create' panel, under 'Geometry/Extended Primitive'. Each model may only have one HitTestTight volume and it should represent most of the main body of a model without any extremities like horns and such. Create a Capsule with radius of 35.0, height of 115.0, and positioned at (0.0, 4.0, -10.0). Name it 'HitTestTight' which tells the exporter that this is a special primitive to be used as the HitTestTight volume.
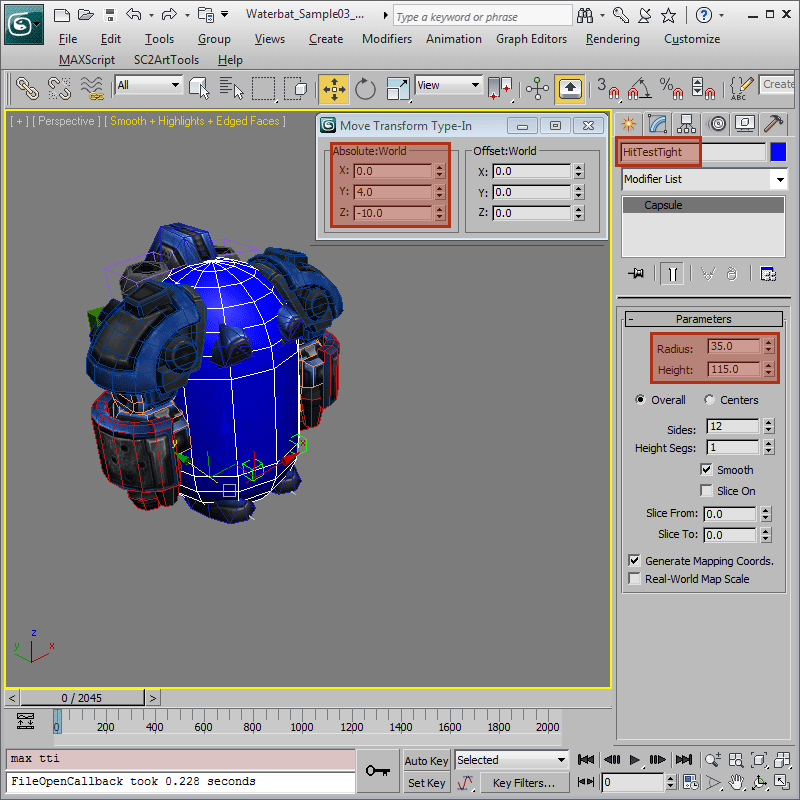
-
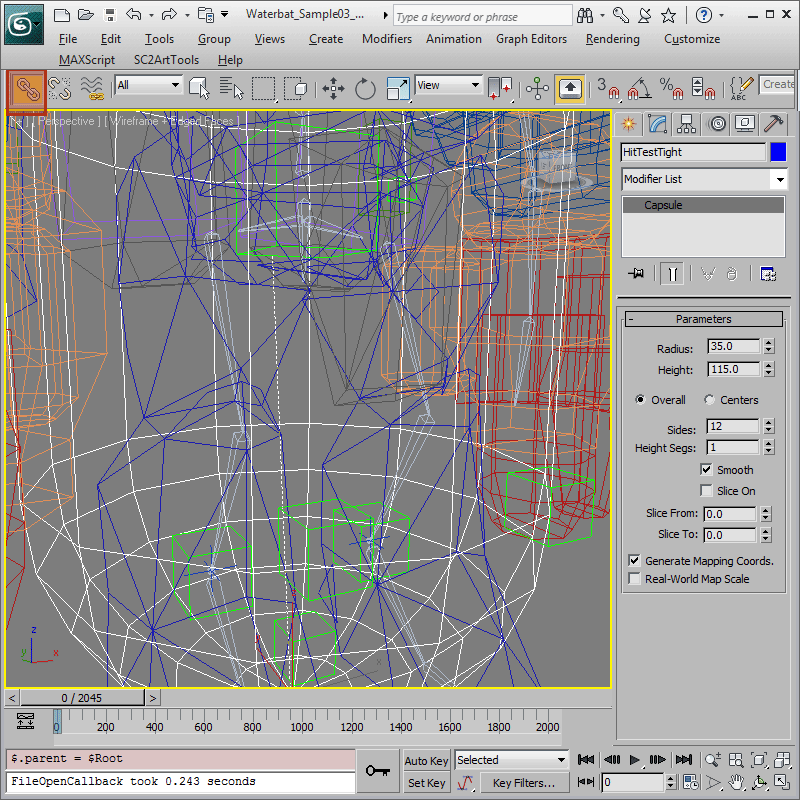
Link the 'HitTestTight' primitive to the 'Root' bone so that it moves along with animations. If necessary, zoom in and switch to wireframe mode temporarily to make it easier to link to the box shaped 'Root' bone.
-
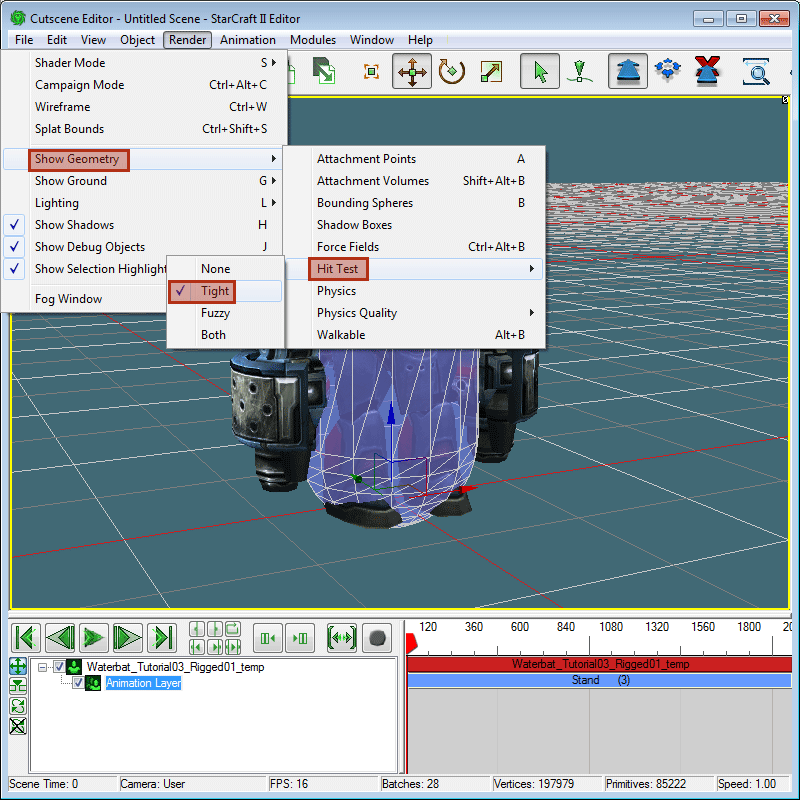
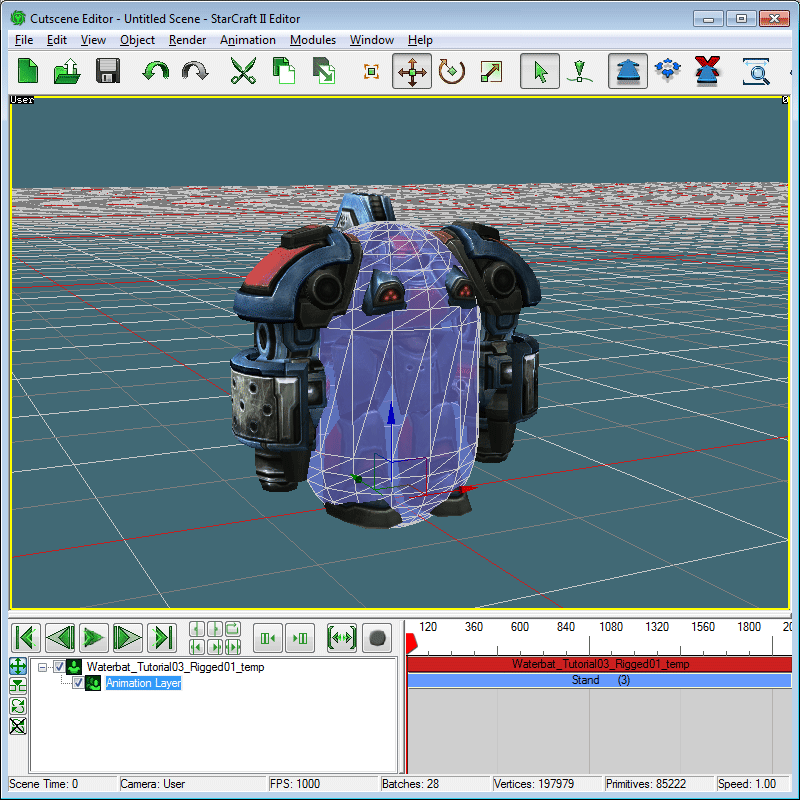
To verify that the Capsule primitive does export as a HitTestTight volume, preview the file and turn on 'Render > Show Geometry > Hit Test > Tight'. A blue capsule representative of the capsule created in 3ds Max should now be displayed.
-
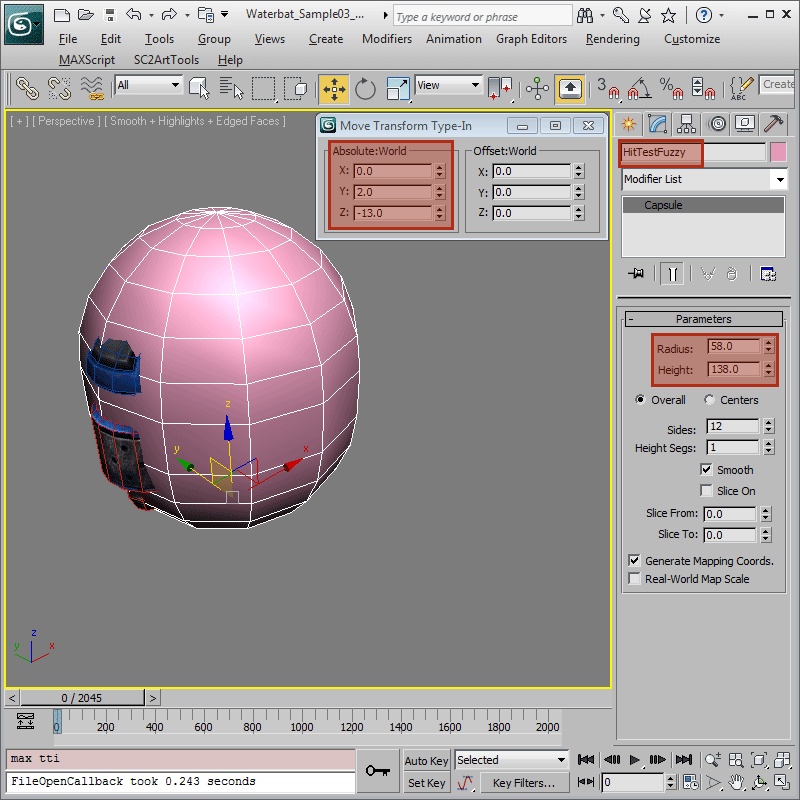
Next, we are going to add some primitives for HitTestFuzzy volumes. Unlike HitTestTight volume, there can be more than one HitTestFuzzy volume per model file. Their combined volumes should cover all visible meshes of the model across all animations. For this tutorial, we will add three Capsule primitives as HitTestFuzzy volumes. In 3ds Max, start by creating a new Capsule primitive with 58.0 radius, 138.0 height, at position of (0.0, 2.0, -13.0). This will cover most of the main body including the feet during all the animations. Name it 'HitTestFuzzy' so that it will export as a HitTestFuzzy volume.
-
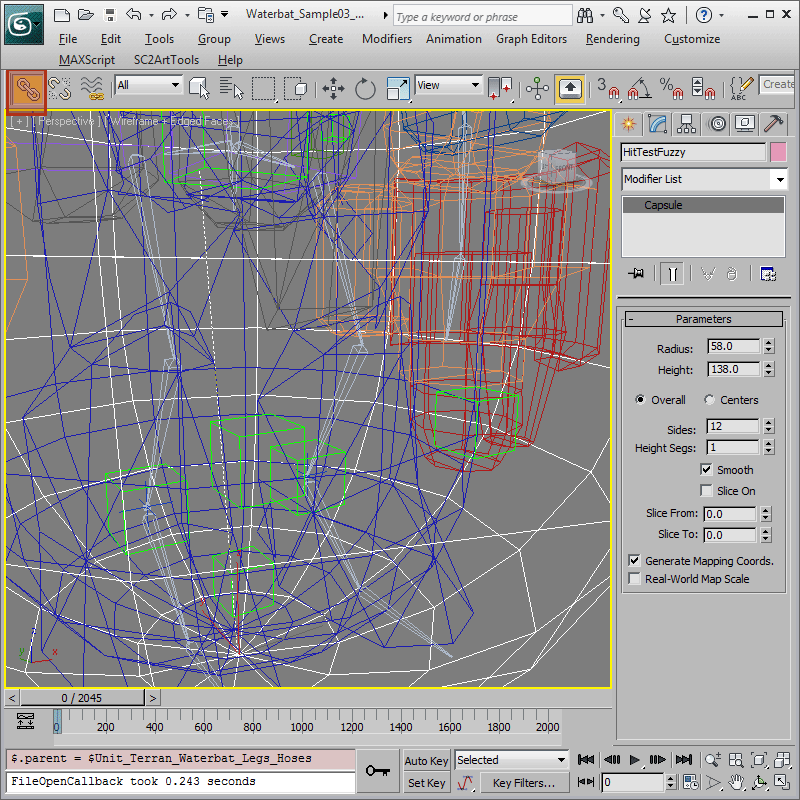
Link the 'HitTestFuzzy' primitive to the 'Root' bone.
-
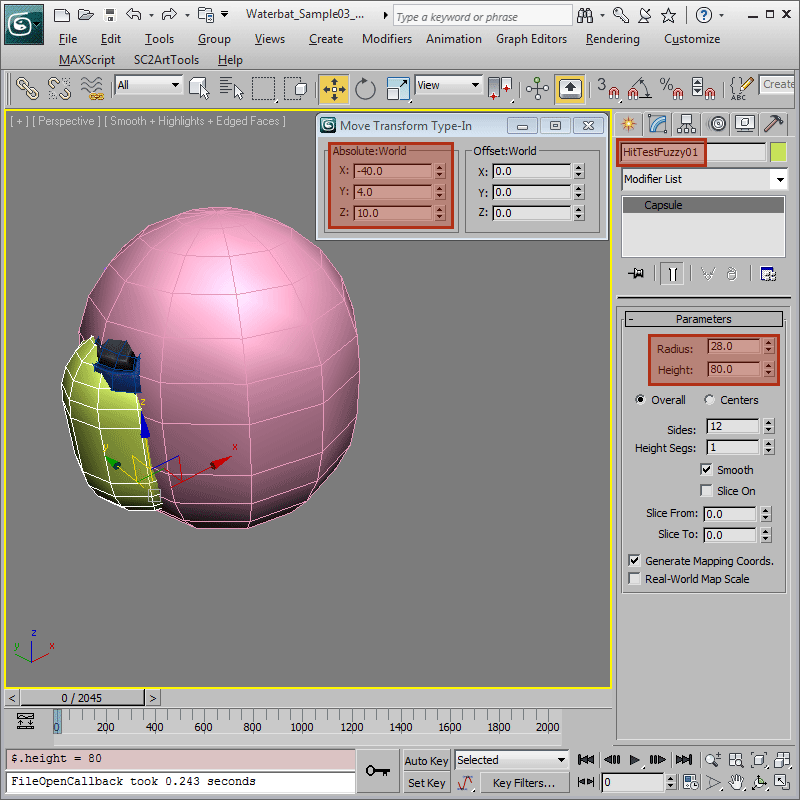
Since the Waterbat's arms can stick out pretty far during animations, we are going to make HitTestFuzzy volumes for each of them. Create another Capsule primitive with 28.0 radius, 80.0 height, positioned at (-40.0, 4.0, 10.0). Name it 'HitTestFuzzy01'. This one will be used for the right arm so link it to the 'BoneForeArmR' bone.
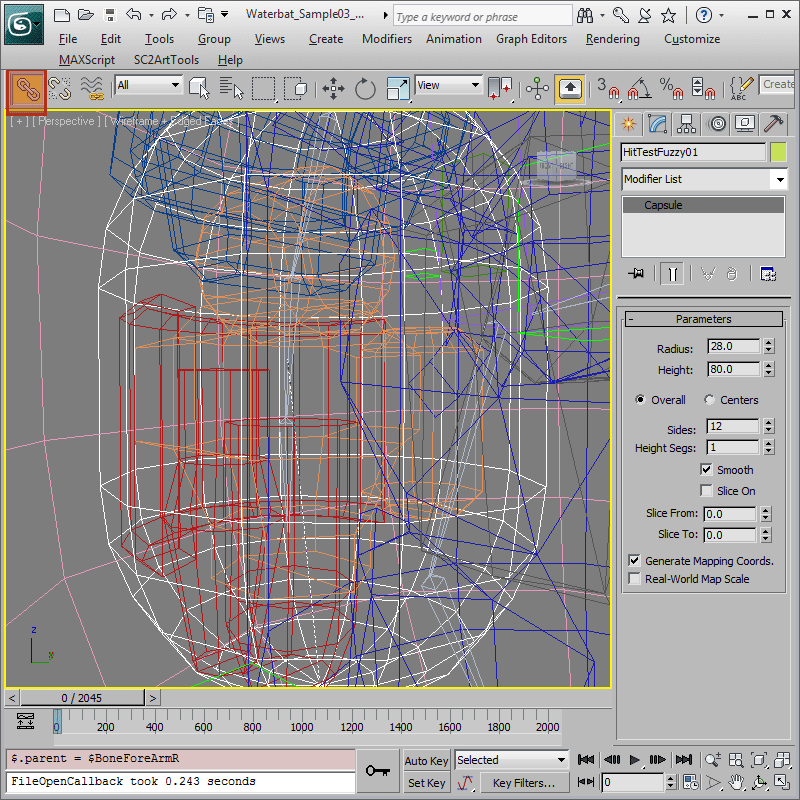
-
Instead of creating another Capsule primitive from scratch, we can duplicate 'HitTestFuzzy01' for the left arm. Shift-move 'HitTestFuzzy01' along the x-axis to (40.0, 4.0, 10.0) to create a copy. It should be named 'HitTestFuzzy02'. Since this is for the left arm, link it to the 'BoneForeArmL' bone.
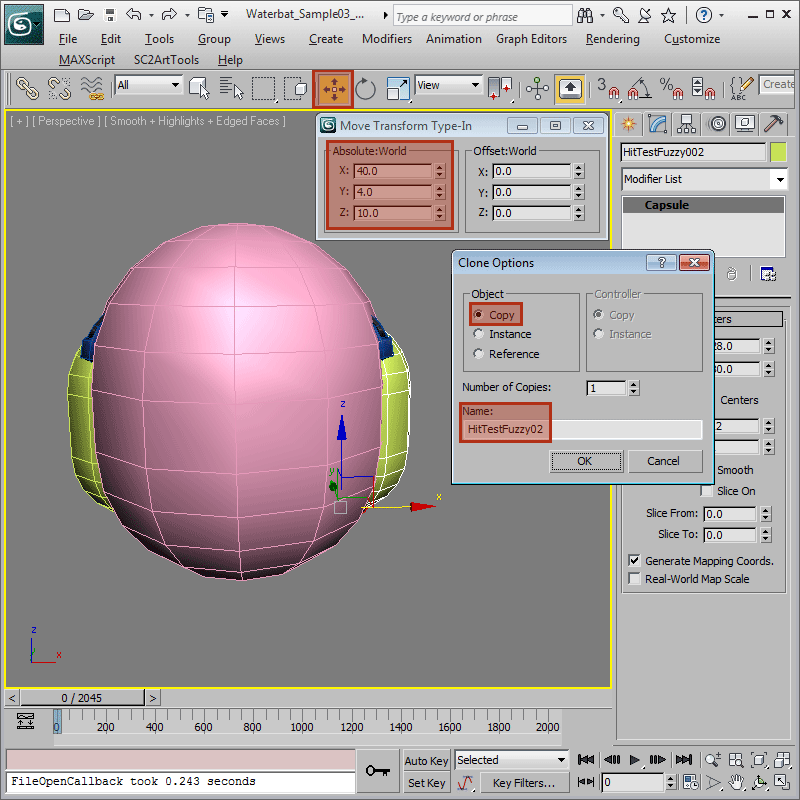
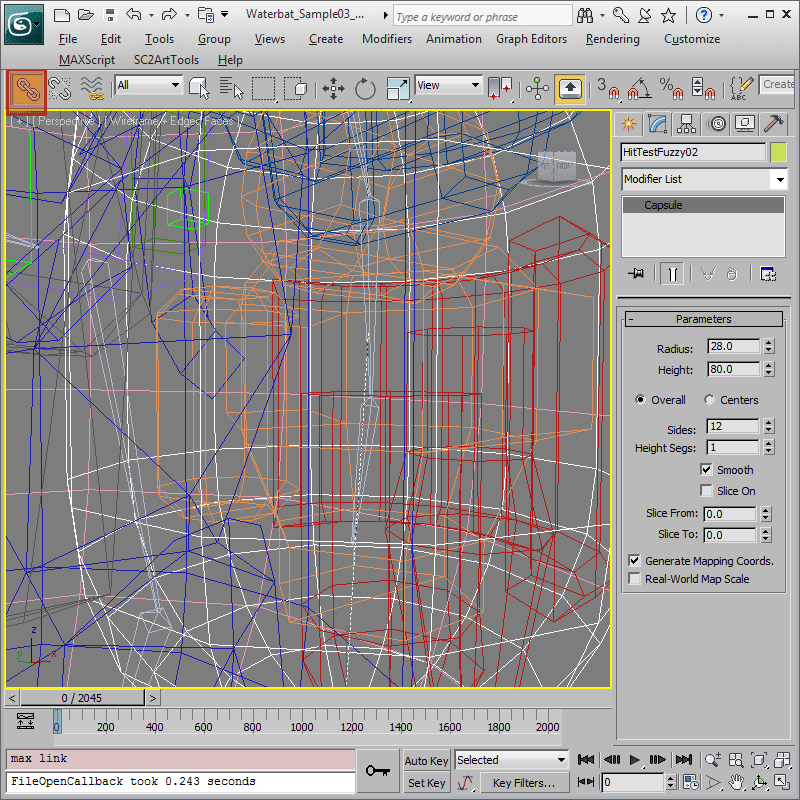
-
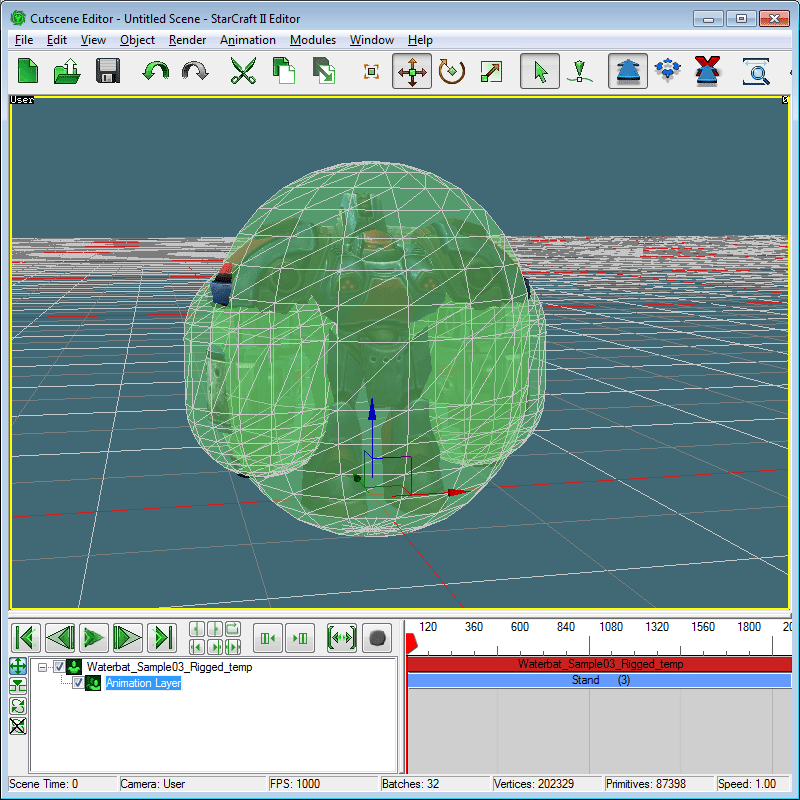
Preview the file to check for HitTestFuzzy volumes. Turn on 'Render > Show Geometry > Hit Test > Fuzzy'. The Cutscene Editor should show the three green HitTestFuzzy volumes.
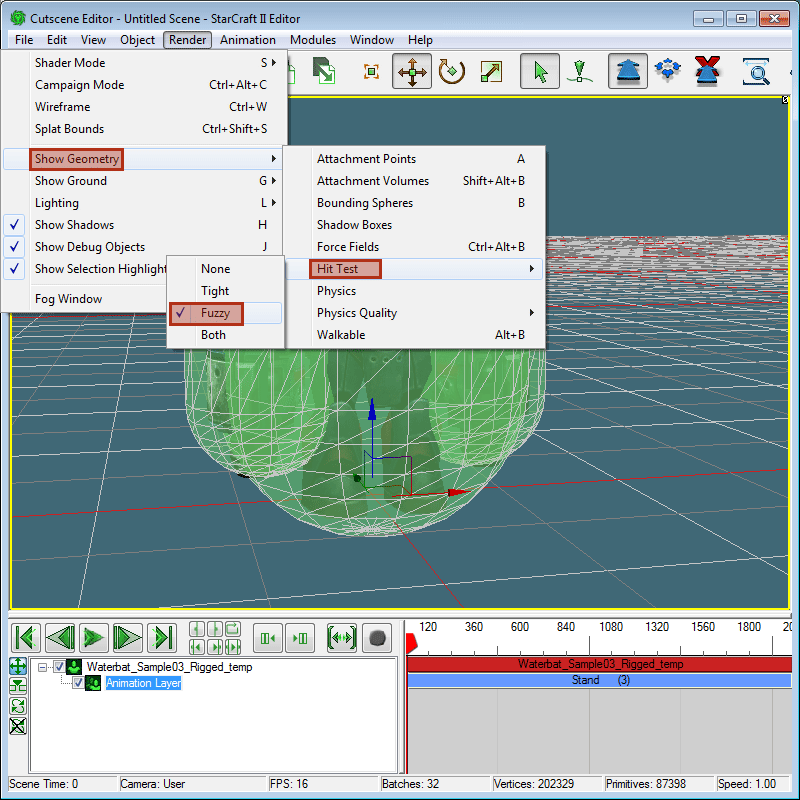
-
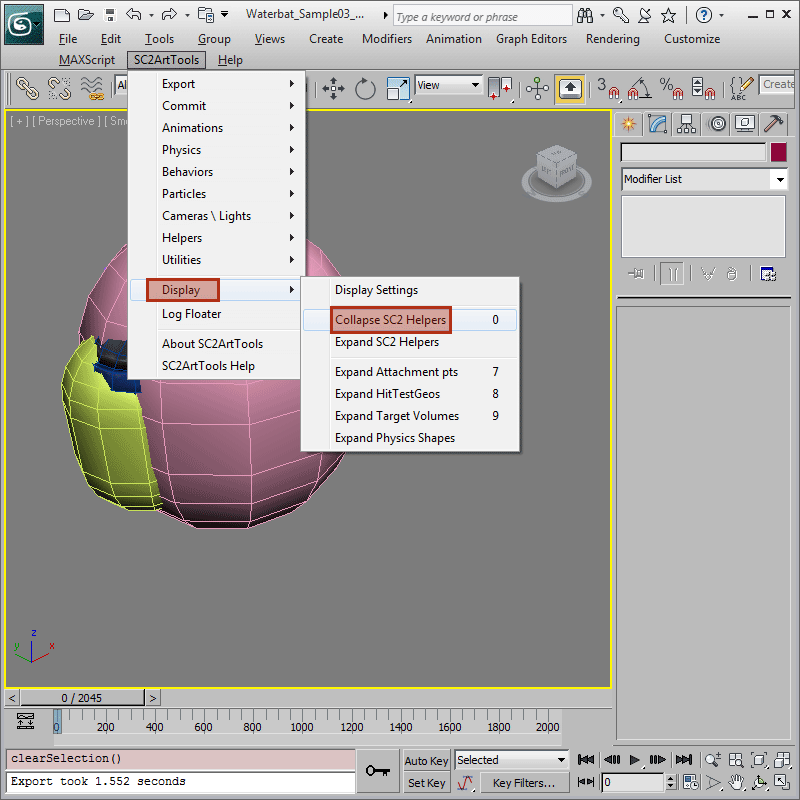
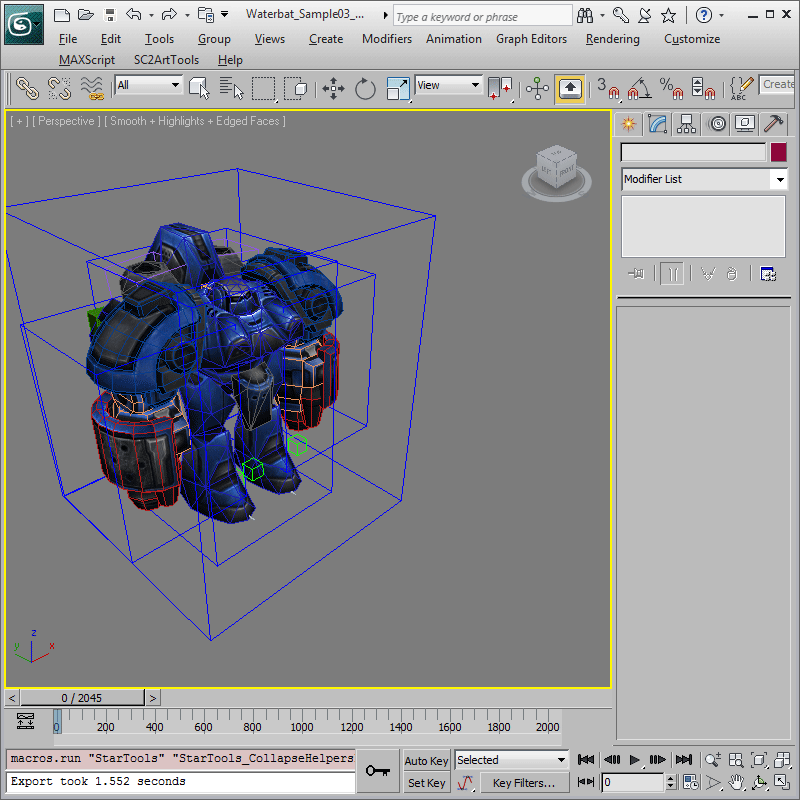
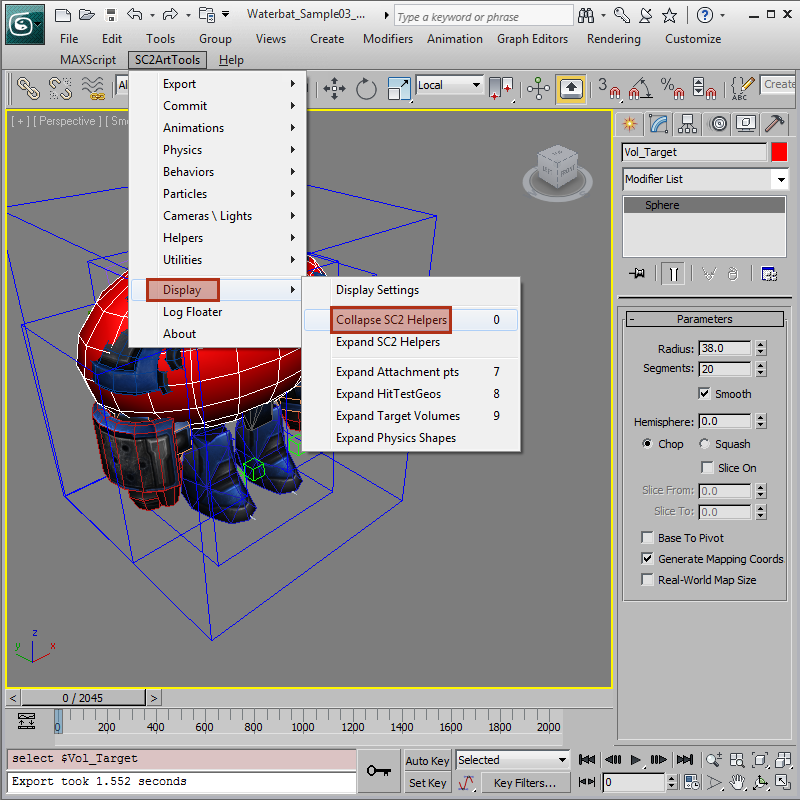
By now, the 3ds Max viewport is pretty cluttered with all the HitTest Volumes. We can fix that by using 'SC2ArtTools > Display > Collapse SC2 Helpers' to make them display as wireframe boxes.
Target Volumes
Target Volumes are also primitive volumes but instead of selection, they are used for placing impact effects on the surface of a unit. More than one is allowed per model file. The combined surfaces should approximate the visible surfaces of the animated model such that impact effects would always appear to be on the surface and not floating nor sunken into the visible meshes.
-
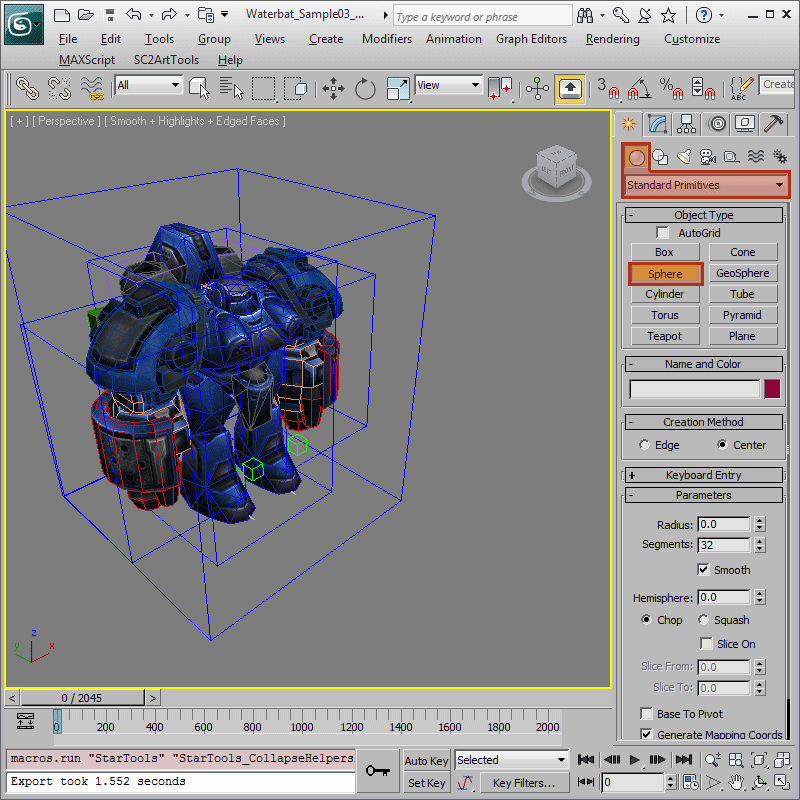
For a smaller ground unit like the Waterbat, one Target Volumes that cover his upper body should suffice since nothing would shoot at his feet from below. We will use the Sphere primitive found in the 'Create' panel, under 'Geometry/Standard Primitive'
-
Create a Sphere primitive with 38.0 radius at position of (1.0, 5.0, 75.0). Name this 'Vol_Target'.
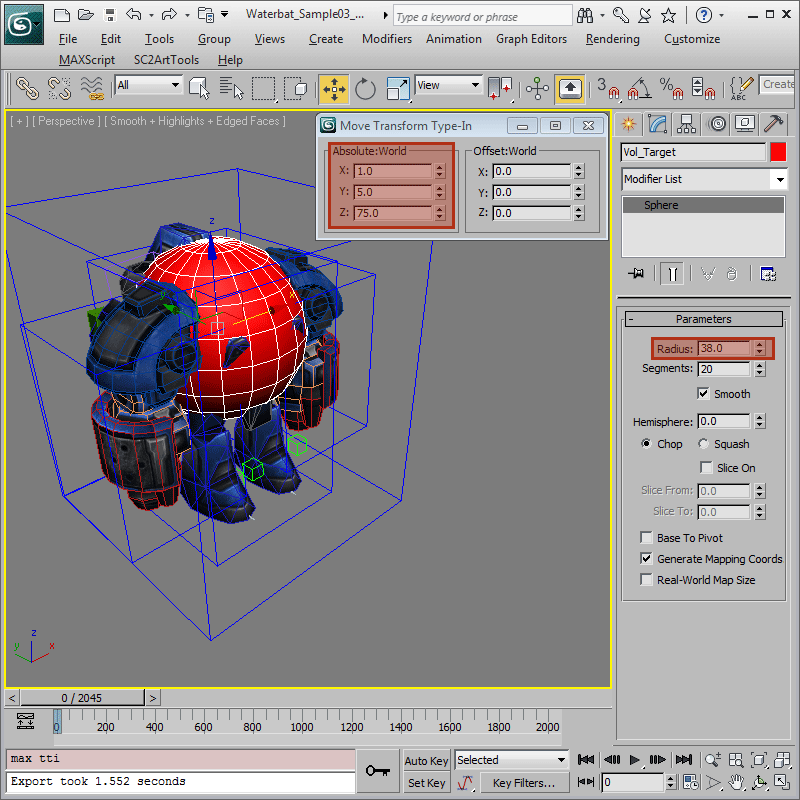
-
To cover the large shoulder pads, we can actually scale the Sphere primitive along the x-axis. Both HitTest Volumes and Target Volumes support non-uniform scaling but it should only be done along local axis. Press the Scale button, and choose Local for Reference Coordinate System. Scale up the Sphere to about the width of the shoulders as shown.
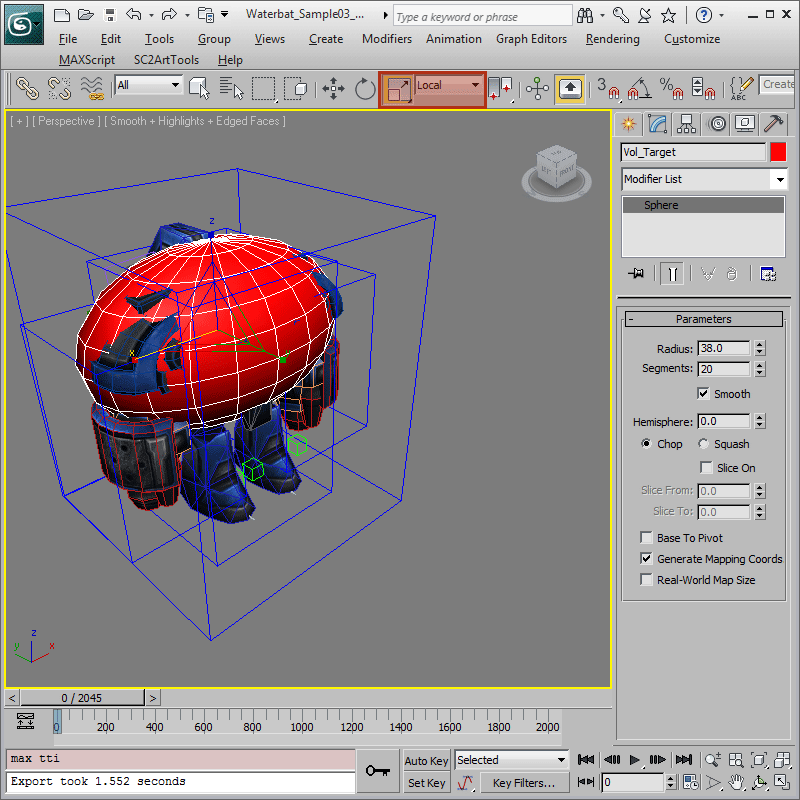
-
Link the 'Vol_Target' primitive to the 'BoneBack02' bone so it would move with the upper body.
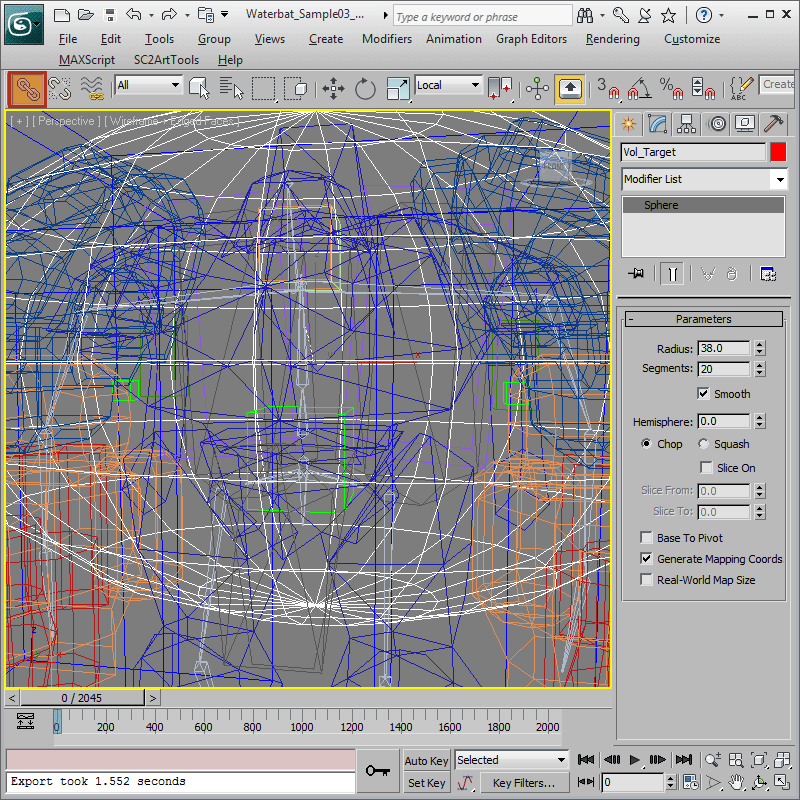
-
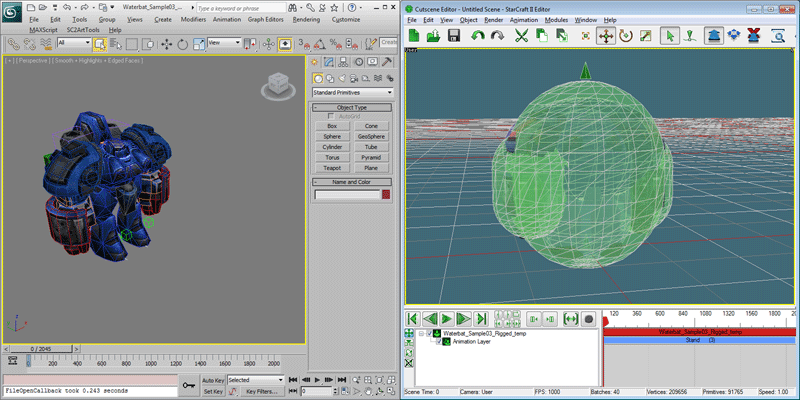
Preview again to check the Vol_Target volume. Turn on 'Render > Show Geometry > Attachment Volumes'. It should show up as a Dark Blue sphere in the Cutscene Editor.
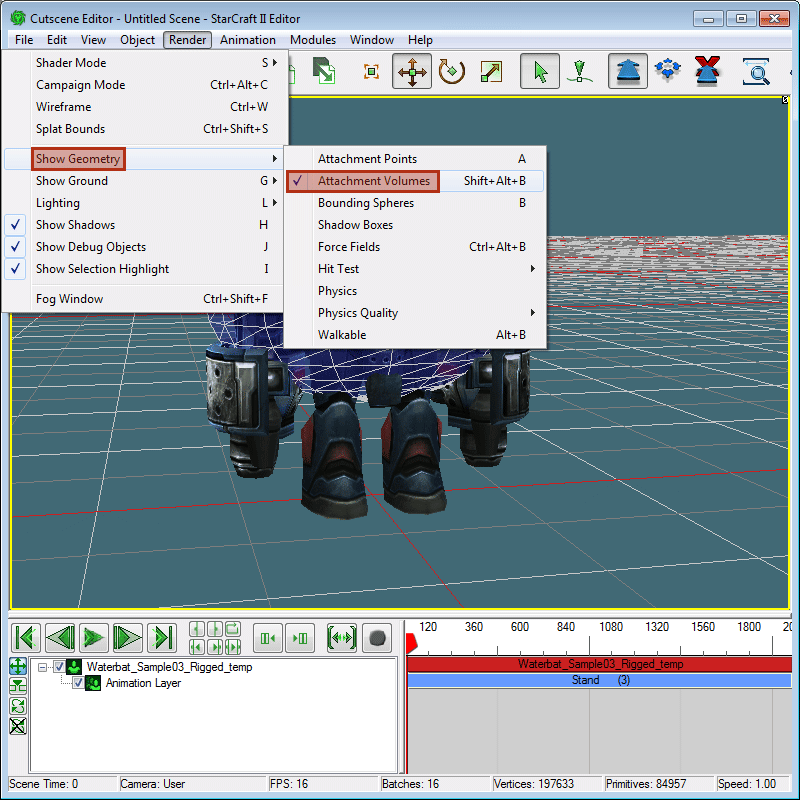
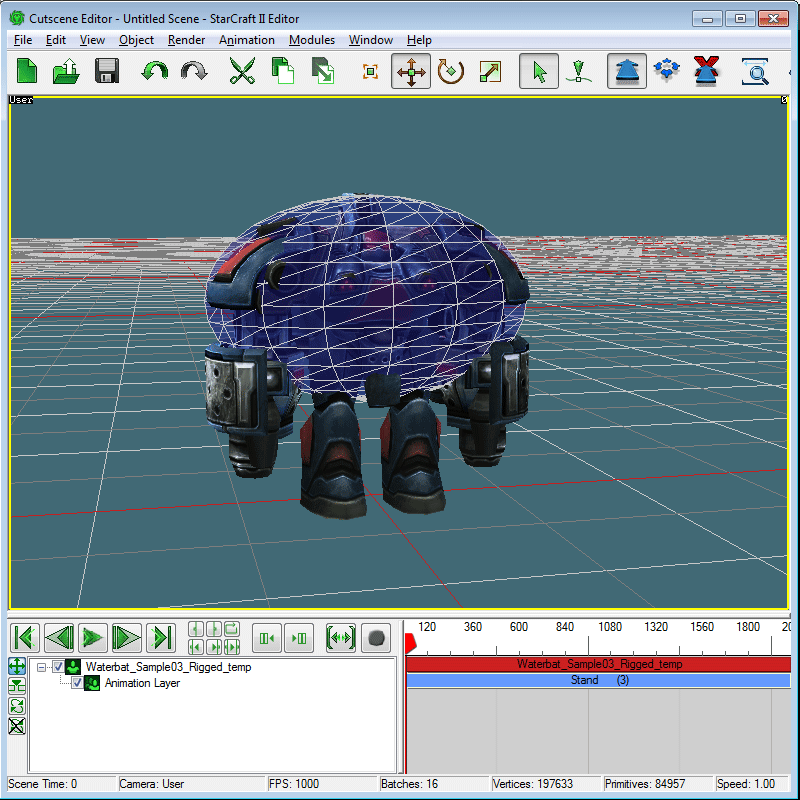
-
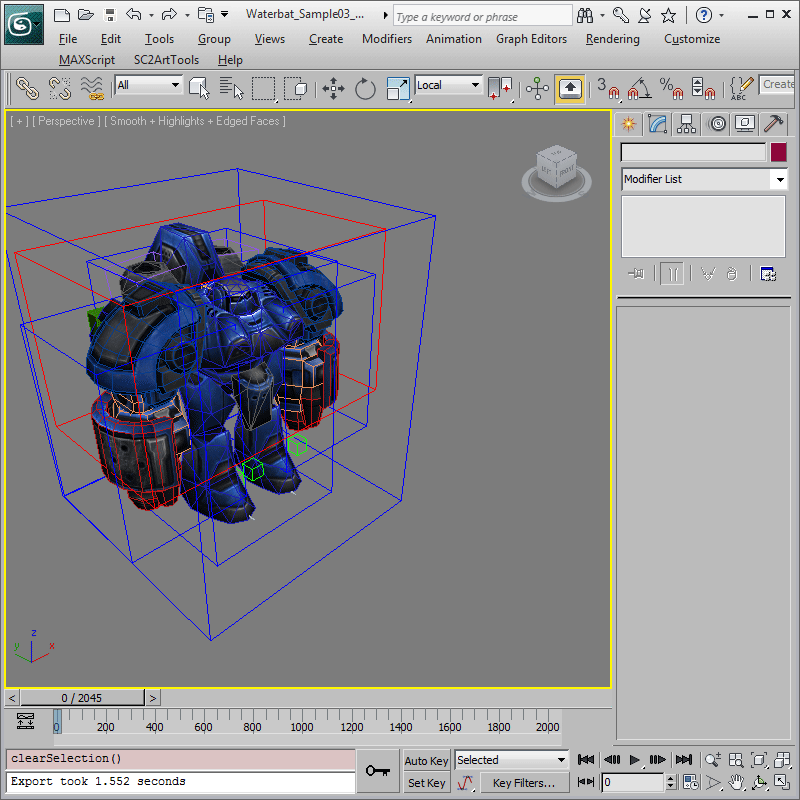
In 3ds Max, use 'SC2ArtTools > Display > Collapse SC2 Helpers' again to unclutter the viewport again before moving on to the next section.
Attachment Points
Attachment Points mark locations in 3d space at which the game can attach effects, UI items, etc. Each Attachment Point is given a specific name indicating its purpose. Some examples of these are locations for gun flashes or timers UI that shows up above a unit. Attachment Points are added in 3ds Max as SC2AttachPt helpers.
-
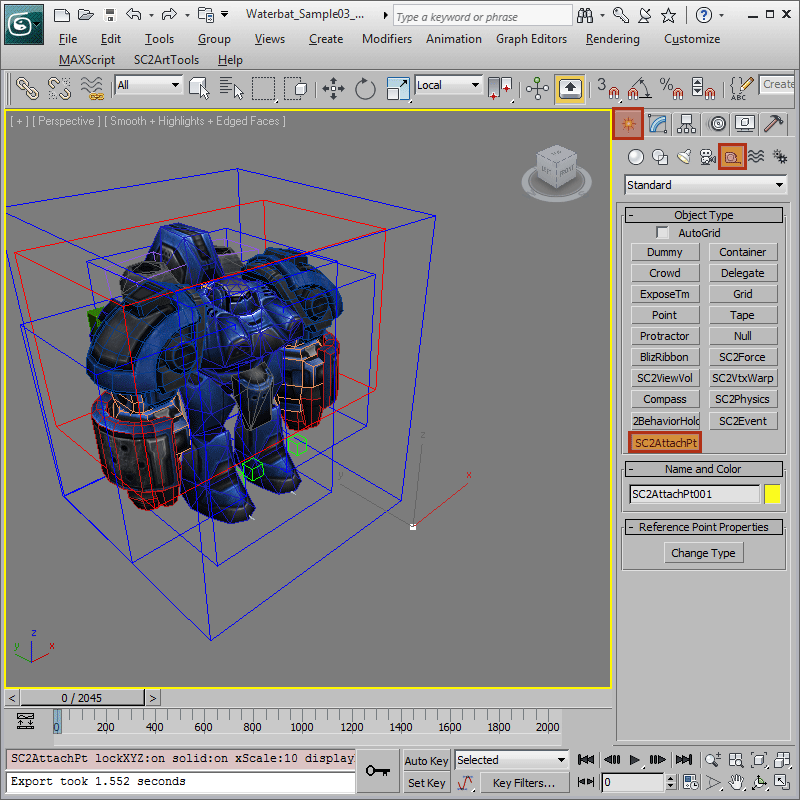
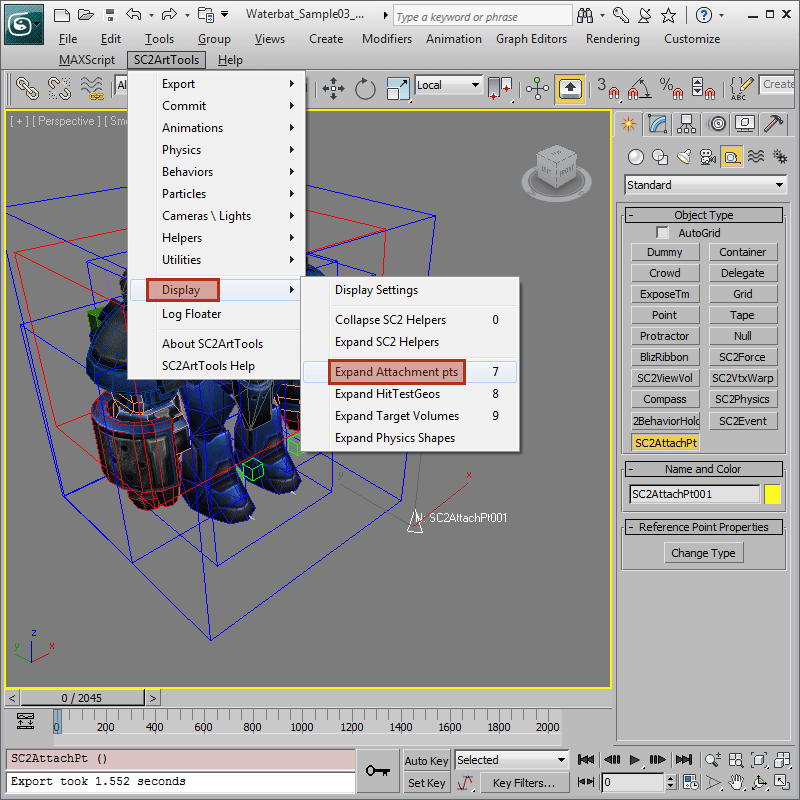
First, we are going to create three Attachment Points every StarCraft II unit or doodads must have- Ref_Origin, Ref_Center, and Ref_Overhead. In the 'Create' panel, under 'Helpers/Standard', press the SC2AttachPt button and then left-click in the viewport to create a SC2AttachPt helper. Since we have used 'Collapse SC2 Helpers' earlier, the new SC2AttachPt may be difficult to see. Go to 'SC2ArtTools > Display > Expand Attachment pts' to make it more visible.
-
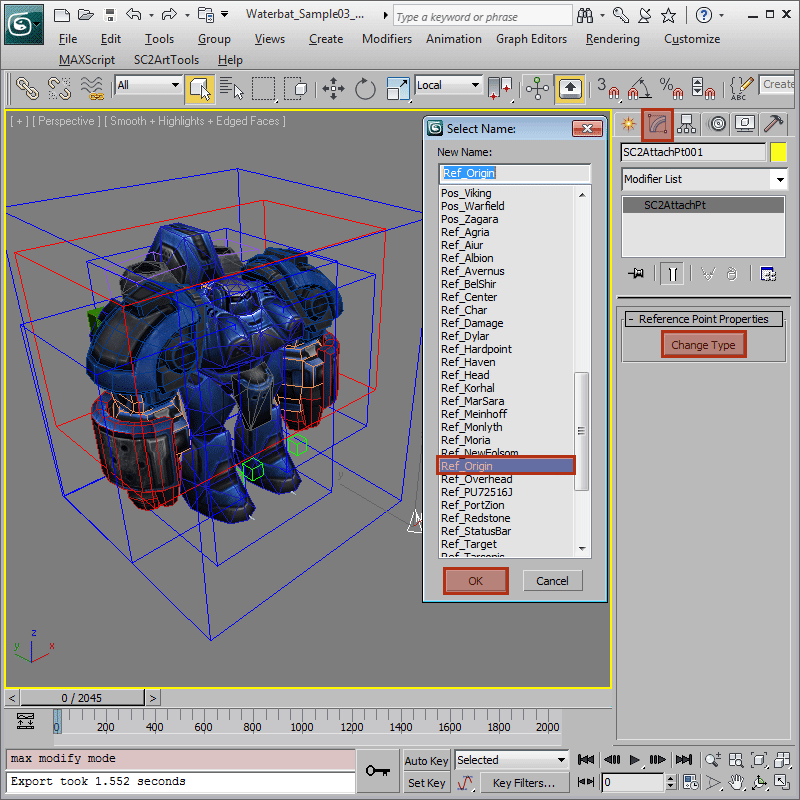
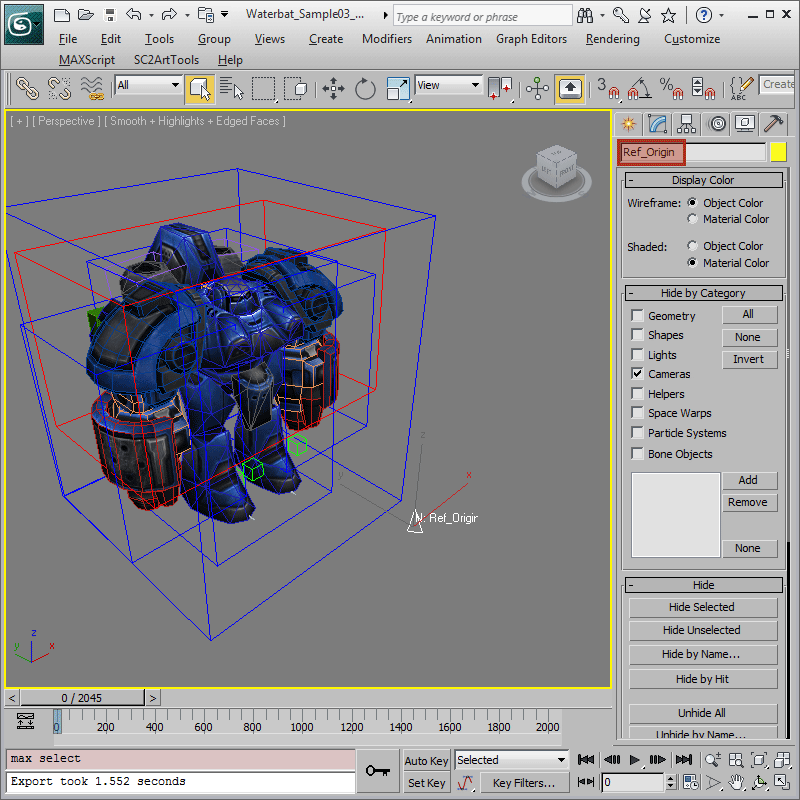
By default, the SC2AttachPt helper is just a generic helper node that wouldn't get exported as a StarCraft II Attachment Point. For that to happen, we need to specify the type of attachment point it represents. To do that, make sure the newly created SC2AttachPt helper is still selected and switch to the 'Modify' panel. Press the Change Type button and a combo-box dialogue would appear listing all the choices for different types of attachment points. Choose 'Ref_Origin' from the list then hit OK. The new SC2AttachPt helper should now be 'Ref_Origin'.
-
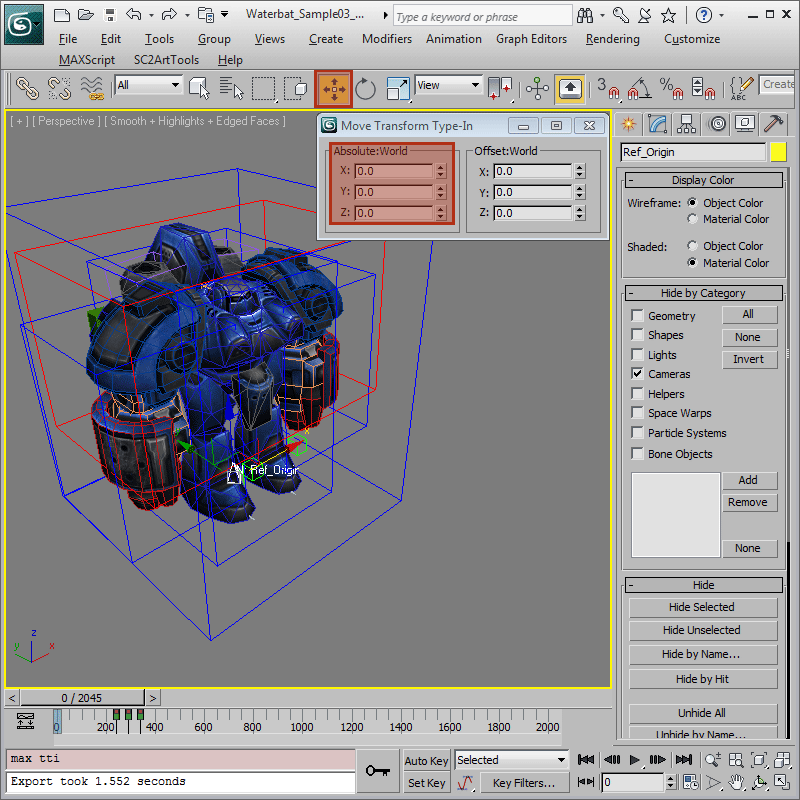
As the name implies, the 'Ref_Origin' attachment point is used for attaching objects to the origin of a model. To ensure that the attachment point is at the origin(0, 0, 0), use the 'Transform Type-In' by right-clicking on the 'Select and Move' button, then enter 0 for x, y, and z.
-
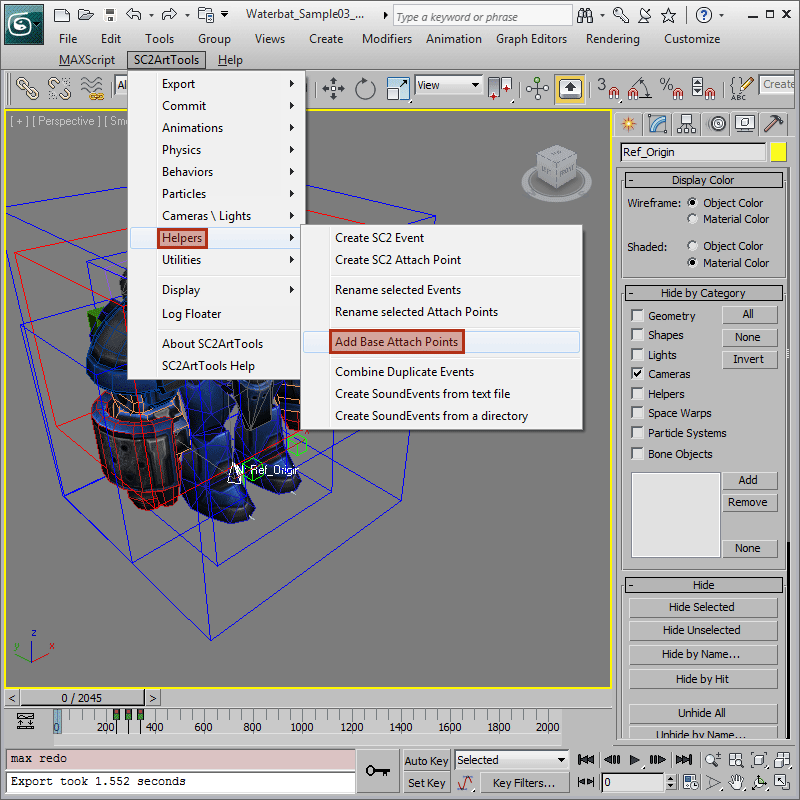
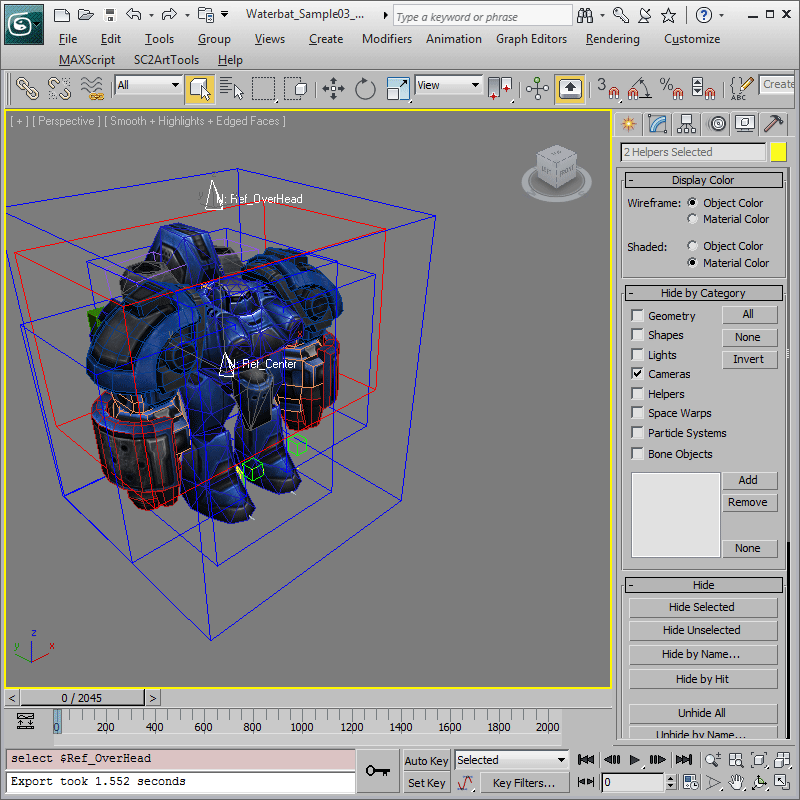
Instead of making the Ref_Center, and Ref_Overhead attachment points manually, there is actually an auto generation tool for the essential attachment points. It only creates the missing essential attachment points, so it would skip the 'Ref_Origin' that was already created earlier. Under 'SC2ArtTools > Helpers', invoke the 'Add Base Attachment Points' function. Both a Ref_Center and Ref_Overhead should be automatically added as a result.
-
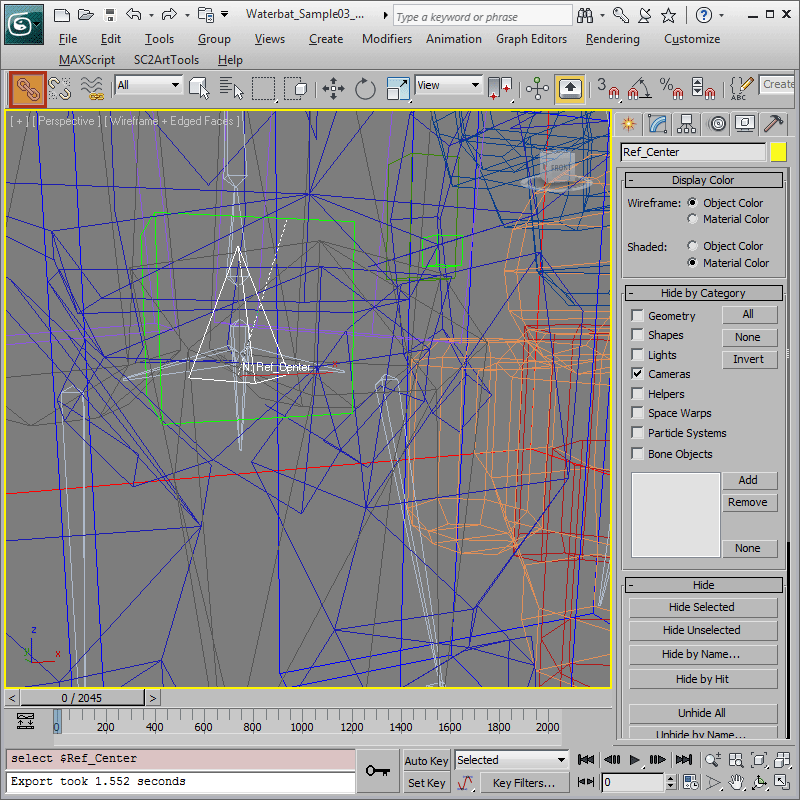
Select and link the 'Ref_Center' primitive to the 'Root' bone.
-
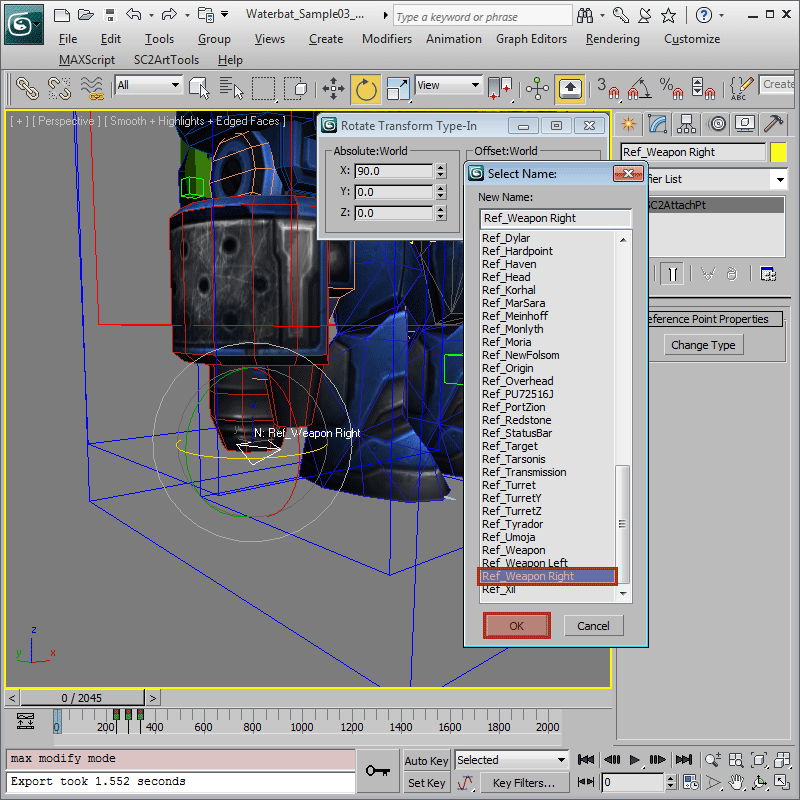
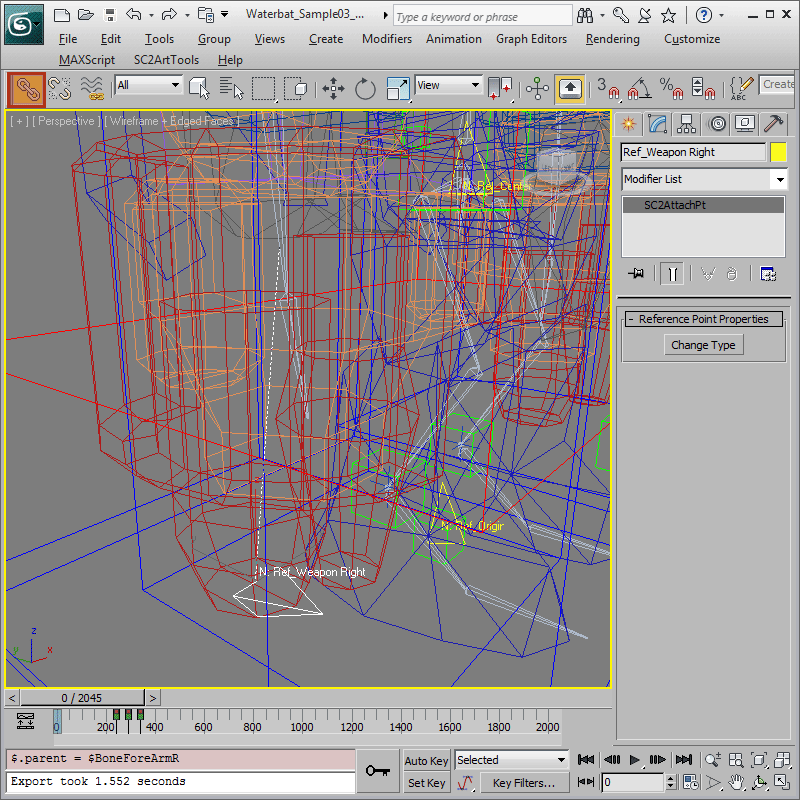
Since the Waterbat is a unit that can attack out of its two cannons, we also need to mark the locations where the cannons fire so we can attach effects to them. For that, we need to place two weapon attachment points, one for the right cannon and the other for the left. Create another SC2AttachPt, and change the type to Ref_Weapon Right. Align the Ref_Weapon Right helper to the tip of the right cannon with the short end of the triangle pointing downward as shown, then link it to the 'BoneHandR' bone.
-
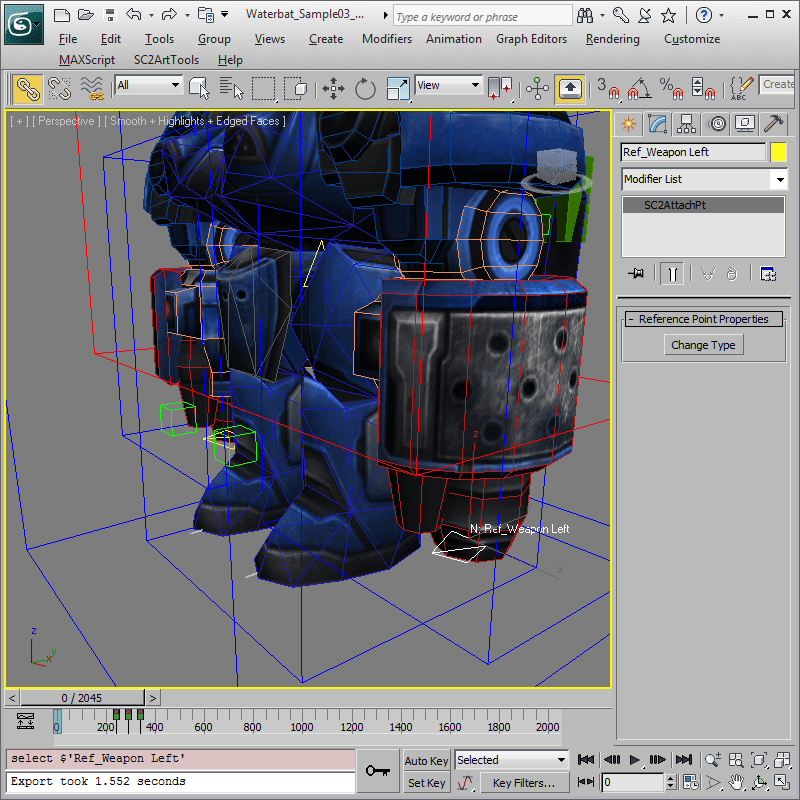
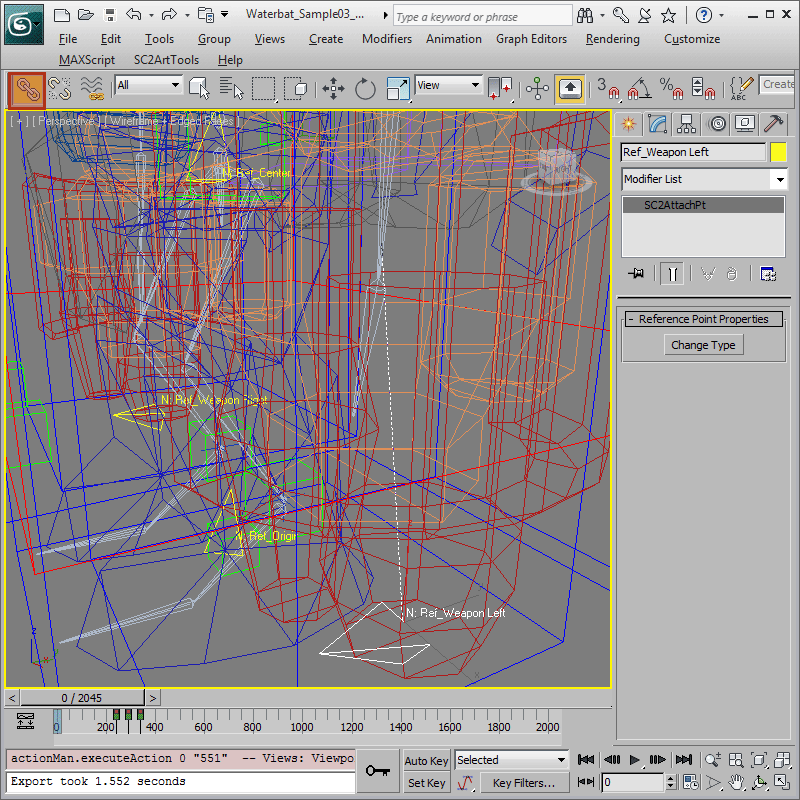
Repeat the previous step for the left cannon and change the type to Ref_Weapon Left and link it to the 'BoneHandL' bone.
-
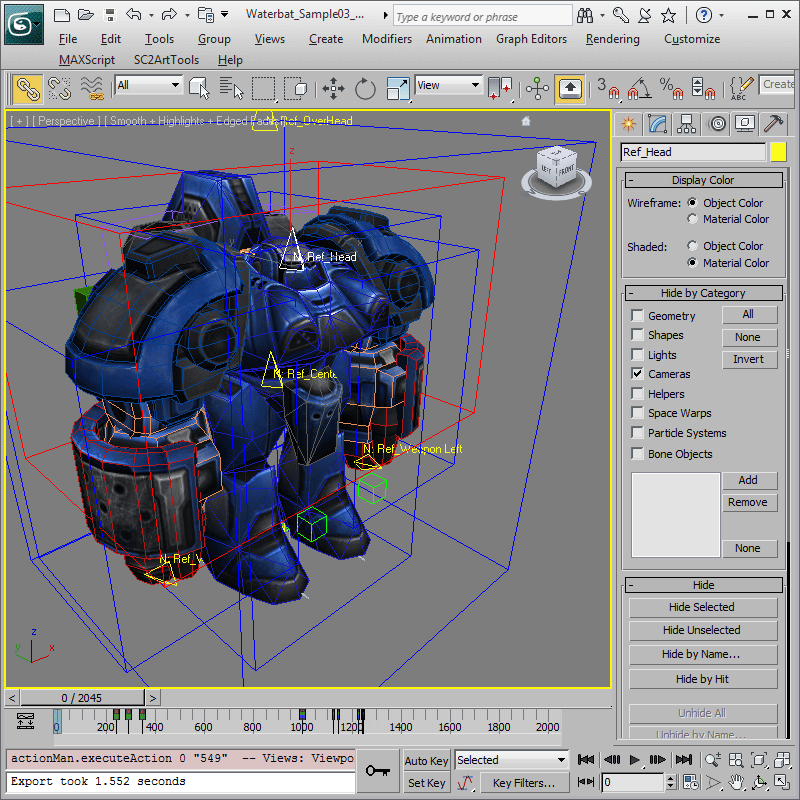
The last attachment point we are going to add for the Waterbat is the head attachment point. Create a 'Ref_Head' type SC2AttachPt helper, then align it to the head and link it to the BoneHead bone.
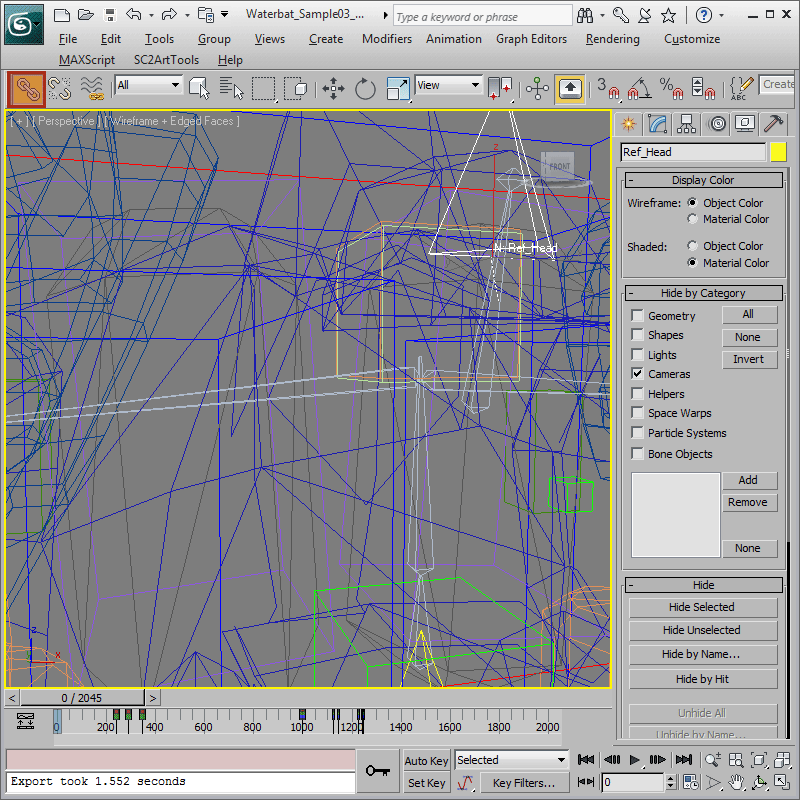
-
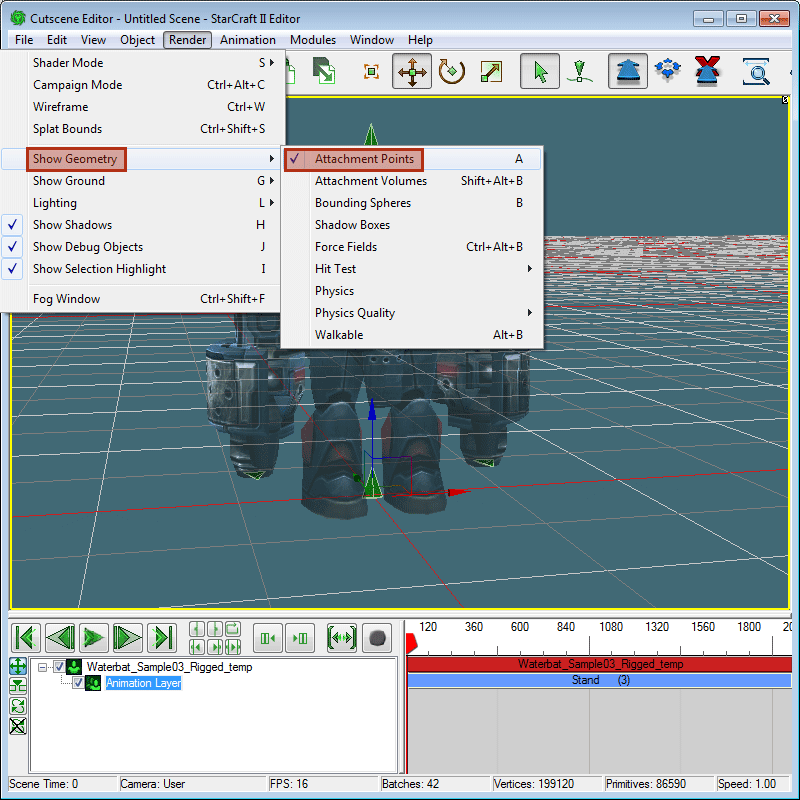
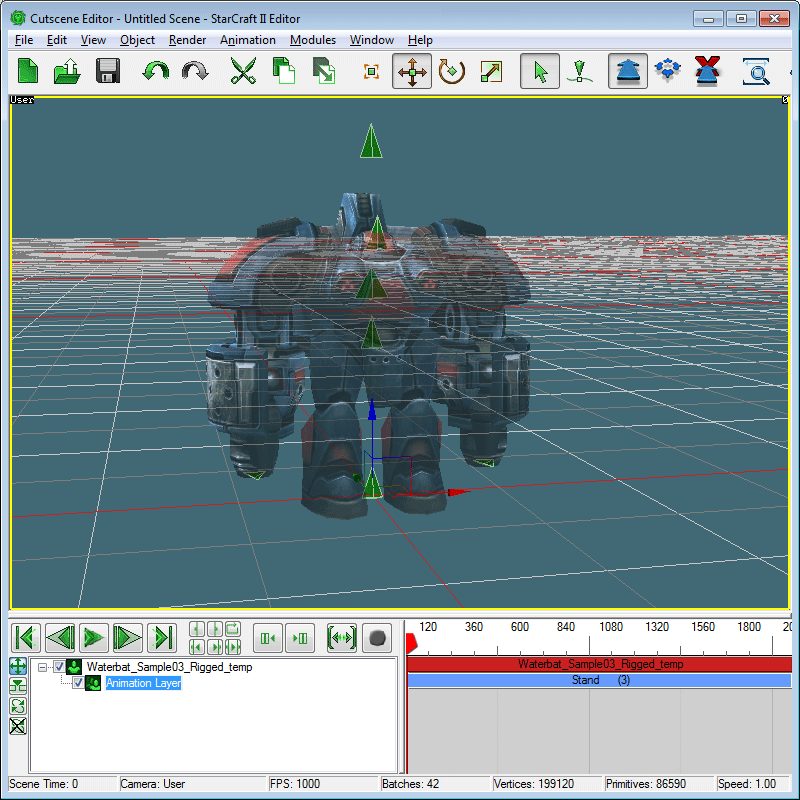
Preview once more to check the Attachment Points. Turn on 'Render > Show Geometry > Attachment Points'. There should now be a few green triangles representing the Attachment Points in the Cutscene Editor. You may notice one extra attachment point that you did not make. There is no need to worry, that one was auto-created to mark the position of the Target Volume you have created earlier.
